Thursday, December 18, 2014

Sweet Potato Curry With Onions, Peppers, & Tomatoes

This sweet potato curry is delicious and quick. It is a versatile side dish to accompany your favorite main dishes. I like using both the cream-colored and orange fleshed sweet potatoes. And I used one of each color of the bell peppers - yellow, orange, red, and green.

Sweet Potato Curry
6 Servings

Ingredients:

1 Tbsp Oil
1/2 Tsp Mustard seeds
1 Tbsp Chana Dal
2 Tsp Urad Dal
1 pinch Asafetida
1/2 Tsp Turmeric
1 stem fresh Curry Leaves, leaves sliced
1 - 2 Green Chiles, minced
1 large Onion, diced
2 - 3 Bell Peppers, any color, diced
1 - 2 Tomatoes, diced
4 - 5 Sweet potatoes, diced
1 tsp Sea Salt
4 Tbsp Fresh Cilantro

Method:

Heat the oil in a kadai (Indian wok) or skillet and add the seeds and dal; when the mustard seeds pop, reduce heat, cover and add the asafetida.

Stir in the curry leaves, green chiles, onions and bell peppers along with the turmeric and a pinch of the salt; cook stirring until softened a little.

Add the tomatoes and the sweet potatoes along with the rest of the salt; stir well, cover and cook over low to medium heat stirring occasionally until cooked.

Turn off the heat and let sit for about 5 minutes. 

Serve hot with a sprinkle of the cilantro leaves. Delicious with any breads, rice dishes, dosa, or kichdi.

Enjoy!!

Sweet Potato curry with Quinoa Kichdi


Wednesday, November 5, 2014

Roasted Potatoes With Rosemary & Garlic

These potatoes satisfy my craving for French fries! These are easy to prepare, very flavorful and absolutely delicious. Any leftovers may be promptly saved in the fridge and reheated before serving.

NOTE: if the garlic is added at the beginning of roasting it tends to get too browned and bitter; I like to add it towards the end of cooking.

Roasted Potatoes
4 Servings - may be :-)

Ingredients:

6 medium Potatoes, any type
1 Tbsp Extra Virgin Olive Oil
1/4 - 1/2 tsp Red Pepper flakes
1/2 tsp Kosher or Sea Salt
A few turns of freshly ground Black Pepper
1/4 tsp Turmeric
4 cloves Fresh Garlic, finely minced
3 - 4 sprigs of fresh Rosemary

Method:

Preheat oven to 425 degree F.

Prepare a large low rimmed baking pan with a light coat of oil or cooking spray.

Scrub the potatoes well, rinse and drain. Peeling is not necessary. Cut into large pieces and add to a the baking pan.

Sprinkle salt, pepper flakes, pepper, turmeric and oil over the potatoes; stir well. Tuck the rosemary sprigs evenly among the potatoes.

Pop the potatoes into the oven and let cook for about 20 minutes on the lowest rack; stir the potatoes using a wide spatula by lifting and turning them.

Stir in the garlic and bake another 10 - 15 minutes or until potatoes are soft, become golden brown, and crispy on the edges.

Remove from the oven and let cool a few minutes.

Serve hot with Thai Chile Sauce or Green chile pesto for those who like it spicy and/or ketchup.

Enjoy!!

Roasted Potatoes With Rosemary & Garlic

Saturday, November 1, 2014

Pumpkin Pie Soup (Pumpkin Soup With Ginger, Cinnamon & Nutmeg)

Pumpkin Pie Soup is a hearty and flavorful soup that is guilt free! It is a light soup which has all the lovely aromas of a pumpkin pie! It is a warming soup especially for an autumn  or winter day or night. 

Although the soup is wonderful just on its own, croutons and/or roasted pumpkin seeds make really tasty garnishes.

Pumpkin Pie Soup
Ingredients:

1 small Pumpkin, Kabocha, or Butternut squash
1 tsp Oil
1 red onion, chopped
1 small clove fresh Garlic (Optional)
1 large Sweet Potato (Yam), peeled and diced
1/2 tsp Turmeric
1 Tbsp Indian Jaggery or Brown Sugar
1 tsp Sea Salt
1 one inch piece Fresh Ginger, sliced
5 whole Cloves
1/2 tsp Cinnamon
1/4 tsp freshly grated Nutmeg
1/4 cup Coconut Milk
1/4 cup Chilled Coconut Milk for serving

Method:

Peel the pumpkin or squash and cut into chunks; the size/shape does not matter since the soup will be pureed.

Heat a soup pot with the oil and add the onions with a pinch of salt; cover and cook stirring often until very soft.

Stir in the garlic, pumpkin, sweet potato, turmeric, jaggery/brown sugar, salt, ginger, cloves and cinnamon; stir well.

Add 4 cups of water and bring to a boil; lower heat and simmer until veggies are soft.

Let cool slightly and puree the soup in batches using a blender or use an immersion blender to puree the soup in the pot. If the soup is too thick, a little boiling water may be added to thin it.

Sprinkle the nutmeg and stir in the coconut milk and heat through but not boil. Test for seasoning, and add additional salt or nutmeg if desired.

Serve hot with a little spoonful of the chilled coconut cream swirled into the soup.

Enjoy!!

Monday, October 27, 2014

Simple Bitter Melon Saute (Parikkai Mezhukuvarati)

Bitter melon is an acquired taste - some take to it right away and others take time. Once you have a taste for it, it is absolutely delicious however it is prepared. The Indian varieties of bitter melon tend to have a stronger bitter flavor sometimes; but the pale green and smoother-skinned Chinese varieties are milder.

Simple Sauteed Bitter Melon
 When we were young children, my baby sister took to it immediately and enjoyed bitter melon as though she were eating candy! Just to make sure we were not missing out, the rest of us would sample a piece or two and decide that it tasted bitter still :-).While we were not crazy about simple sautes and curries, we did love chips and Pitla, a classic South Indian dal stew with bitter melon.

Without further ado, here is Simple Bitter Melon or Parikkai Mezhukuvarati (=saute). I used the pale green Chinese variety for this; but any type may be used. If the bitter melons are very bitter, my mother often sprinkled a little tamarind water or lime juice and a little brown sugar while cooking.

For an easy baked version, check Easy Baked Bitter melon/Parikkai Fry.

NOTES:
1. The veggies may be sliced using a food processor after trimming and cleaning.
2. If you like it spicy, coarsely grind 1 tsp cumin seeds with 1 dried hot red chile in a spice grinder and sprinkle this towards the end of cooking and stir -fry for a minute or two before removing from heat.
3. For those who like onions, 1 chopped onion may be added along with the green chiles and cooked until translucent before adding the melon slices.

About 4 servings as a side dish

Ingredients:

2 large bitter melons
2 or 3 green chiles, ends slit
1 stem fresh Curry Leaves, sliced thinly
1-2 tsp Coconut Oil
1/4 tsp Brown Mustard seeds
1 small pinch Asafetida
1/4 tsp Turmeric
1/2 tsp Sea salt

Method:

Wash and trim the bitter melons; halve them and check the seeds - if they are soft and white, leave them in. But if the seeds are mature, the pulp would begin to get red and seeds would be too hard; if the pulp is beginning to color, remove it with a teaspoon like you would from a cucumber.

Thinly slice the bitter melons; I quartered them longitudinally as they were quite large in diameter.

Heat the oil in a large enough pan that can accommodate all of the veggies easily and add the mustard seeds; when they begin to pop and dance, reduce the heat and add the asafetida and mix well.

Quickly add the green chiles, curry leaves and the sliced melon.

Sprinkle the turmeric with the salt over the veggies and stir well.

Cook over medium heat stirring often; use a cover between stirring.

Check to see if the veggies are done; it should not take more than about 10 minutes.

Serve hot with freshly cooked rice or another grain, Indian flat breads like roti/chapati/naan, a dal dish like Sambar, other veggies, and papadams.

Enjoy!!

Friday, October 17, 2014

Root Veggies With Green Chile Pesto (Kerala Style Root Vegetables With Green Chile Sauce)

Sweet & Regular Potatoes with Green Chile Pesto
I call this dish Kerala boil ( Kizhangu vevichathu/puzhungiathu - boiled tubers or root veggies) - it is one of life's simplest of pleasures; just gather together just one or as many types of root veggies as possible for their delicious diversity. Add the traditional pounded green chile chutney made in minutes to complete the meal and ah - a meal to please the hobbit in anyone!! The green chile chutney is similar to chimichurri.

In Kerala, there are many varieties of root veggies which lend themselves to making Kerala Boil. The main traditional and inexpensive root veggie for this dish is Kappa, also known as marakizhangu or maracheeni (Cassava, Tapioca, or Yuca); but  Sweet Potatoes (both orange and cream colored), Chembu (Taro), and  various types and colors of  potatoes may be added for variety. The veggies are typically cut into thick cylinders known as chenda (drum). I do not limit it to starchy roots and tubers but love to add other veggies such as summer and winter squash, corn on the cob, carrots, etc. for a feast for the eyes as well as the palate. I not only boil the veggies but steam, roast, bake or broil too!

The recipe is very simple. Here I only had sweet potatoes (a couple each of both cream color and the orange color) and a few regular potatoes; time to go shopping, I know :)

If fresh curry leaves are not available, make the chutney with fresh cilantro; delicious!


Serves 4

4 - 5 lbs Assorted Potatoes & other Root Veggies
Sea salt

Clean the veggies by scrubbing and washing them. They may be peeled or not; cut into thick rounds. 

Bring a large pot of water to a boil; add a Tbsp of salt and add the prepared veggies.  Cook until tender, drain and keep hot.

Alternately, the veggies may be baked, roasted or even cooked over hot coals in a barbecue.

Green Chile Pesto/Chutney

2 - 3 green chiles, chopped (you may use more if you like)
2 stems Fresh Curry Leaves, chopped
3 - 4 Shallots or 1 small Red Onion, chopped
Sea salt to taste
3 - 4 Tbsp Coconut or Extra Virgin Olive Oil

Pull the leaves off the stems of curry leaves and discard stems.

Pound green chiles, curry leaves and shallots in a mortar with a pestle until coarsely crushed. If you must use the food processor, please chop everything by hand first and then pulse just two or three times just to mix.

Add the salt and enough oil and mash a little to make a sauce.

Taste and add more oil to mellow out the taste of chiles and shallots/onion.

Coconut oil is traditional choice and is delicious; but good olive oil is very tasty also.

Serve spoonfuls of the sauce over the hot vegetables.

Enjoy!!

Sunday, September 28, 2014

No-Cook Aval - Sweet or Savory (Flattened Rice Snack Two Ways)

No-Cook Savory Aval
Aval (poha in Hindi), made from rice, is an extremely user-friendly staple; it is similar to oatmeal. Parcooked or steamed rice in its husk is pounded flat to make aval. Although one can cook with it, aval is eminently edible without any cooking!

Aval (poha) is an ubiquitous staple in a typical South Indian Home to be made into a number of quick and delicious recipes! It is very easy to prepare either sweet or savory dishes especially when it is hot and one does not want to venture anywhere near a stove for love or money :-).

Notes:  Check the aval for any foreign or discolored particles and discard them. Place in a bowl and cover with water; swirl with fingers quickly to get any husk pieces to emerge and float up. Pour out all the water along with the floaters. The drained aval is now ready to use in the recipes.

Fresh coconut is best for these recipes; but frozen is acceptable. If only dehydrated or dessicated coconut is available, add water and let it hydrate well for about 10 minutes or so before adding to your recipe. For the Sweet Aval, jaggery tastes the best; but brown sugar is an acceptable substitute.

No-Cook Savory Aval with Brown Chickpeas

Ingredients for Savory Aval
Savory Aval:
A quick and easy recipe especially great for tea time! Although there is thalippu that is cooked, since there is no actual cooking of the aval or veggies I think of this as a no-cook recipe! I like to make it as a quick meal often; sometimes I add the brown chickpeas; thawed peas and corn are great additions - I don't cook them - just thaw and toss in! It turns out that this Savory Aval is great hot also; I warmed up leftovers for a lovely warm snack!

If  Sambar powder is not available, use Rasam or curry powder instead; or toast the coriander seeds, cumin seeds, and the red chile given below in a small pan until fragrant and lightly browned. Cool and grind well into a fine powder; since the spices are already toasted, the ground powder can be added directly to the aval mixture.

Spices instead of Sambar powder:
1 tsp Coriander Seeds
1/2 tsp Cumin Seeds
1 dried hot Red Chile

INGREDIENTS:

1 cup Thin/Thick Aval (poha)
1/2 cup grated Coconut, fresh or frozen
1/2 tsp Sea Salt
1 tsp Sugar
2 - 4 Shallots, OR 1/2 small Red Onion, finely chopped (optional)
1/4 cup fresh Cilantro, chopped
1/2 Lemon/Lime, juiced
1/2 cup cooked Indian brown Chick Peas (optional)
2 Tbsp roasted Peanuts/Cashews
1/2 cup Indian Sev or another Indian snack mix (optional)

Thalippu/Tadka:
1 tsp Oil
1 big pinch Brown Mustard seeds
1 tsp Urad dal
1 tsp Chana dal (optional)
1 little pinch Asafetida (optional)
1-2 fresh green chile, minced
1 stem fresh Curry Leaves, sliced into chiffonade
1/2 tsp ground Turmeric
1-2 tsp  Sambar powder 

Place the washed aval in a large bowl (check notes above for cleaning/washing the aval/poha).

Squeeze the lemon/lime juice over it and set aside while preparing the rest of the ingredients.

Prepare the thalippu/tadka: heat the oil, add the mustard seeds and the dals; when mustard seeds pop and the dals turn pinkish, add chile and curry leaves carefully (chile and curry leaves may sputter and pop) and cook for a few seconds. Stir in the turmeric and sambar powder. Add to the aval.

Add the rest of the ingredients (except the nuts, sev or snack mix) to the bowl and mix well; let rest for 10 minutes before serving.

Savory Aval may be made up to one or two days ahead. Check for seasonings before serving.

Serve at room temperature mixed/topped with the peanuts and snack mix.

Enjoy!!

Quick sweet avalThere are two ways to make sweet aval.

1. Pal Aval: softened with hot milk (any type - almond, soy, cashew, etc), sweetened with jaggery or sugar, and served hot, warm or cool; a gluten-free milk-"toast"!

1 Serving

1/2 cup thin Aval, prepared as directed above
1/2 cup hot Milk, any type
Jaggery/Brown Sugar/White Sugar to taste
1 tiny pinch ground Cardamom (optional)

Mix all the ingredients together in a bowl and let the aval soften for at least 10 minutes. Serve warm. Enjoy!!

2. Sweet Aval without milk: Very similar to muesli. This recipe is simplicity itself! Just mix aval with coconut and jaggery; we often had this sweet aval (aka "nanacha" aval - literally moistened aval) as an after-school snack often as it is quite effortless to prepare it at short notice! Although Amma only used a very flavorful small banana available in Kerala, any ripe banana may be used. Other fresh/dried fruits or nuts may be added as well.

Serves 2 - 4

1 cup Thin Aval, washed as directed above
1/3 - 1/2 cup fresh grated Coconut
1 small ripe banana, diced (optional)
1 Tbsp Each - Cashew pieces and Raisins (optional)
3-4 Tbsp grated Jaggery or Brown Sugar
1/4 tsp Ground Cardamom


Mix together all the ingredients well; let rest for at least 15 minutes before serving. If made ahead, chill until needed. Serve at room temperature.  Enjoy!!

Saturday, September 27, 2014

Achards de Legumes (Pickled Veggies Mauritius Style)

Achards de Legumes 
This recipe is very similar to Hema's Vegetable Achar; both are based on Mauritian fare. We love heaping up achards on toast or a roll for a very satisfying repast whether at breakfast, lunch, or a yummy snack any time. The pictures show Achards made without cauliflower but all the other ingredients - so you see that the recipe is quite flexible :)

Cauliflower and turnips are good on an anti-inflammatory diet, so I thought of making the "Achards" (as it is called in Mauritius) with them instead of the cabbage. I was told that in Mauritius, they sell Achards de Legumes and freshly baked bread before the grocery stores open! What a great idea! A delicious peace offering to keep the waiting hungry shoppers from getting grumpy :)!

Notes:
* Use a non-reactive bowl and pan for making the achards (stainless steel, ceramic, glass).
* I make a huge batch and keep the achards in 2 or 3 jars - easy to use as well as for giving as gifts.
* I cut the carrots, cauliflower, and bell pepper with a knife so as to keep them nice and not shredded too much.


Ingredients:

2 Tbsp Brown Mustard Seeds, freshly ground (coarse)
1/2 tsp Fenugreek Seeds, coarsely ground (optional)
2 tsp Sea salt or to taste
1/2 tsp Turmeric
2 Onions, thinly sliced
2-4 Hot green Chiles, thinly sliced (optional)
1 clove fresh Garlic, minced
1 Tbsp Oil
1-2 Turnips, coarsely shredded
1/2 small cauliflower, cut into small florets
1 bell pepper, thinly sliced
1 large Carrot, cut into matchsticks
1/4 cup Apple Cider Vinegar

Method:

Prepare all the veggies - this is the part that takes a bit of time; once the veggies are ready, it just takes a couple of minutes to finish the achards.

Heat the oil and stir in the ground seeds and cook for a few seconds.

Stir in turmeric and salt and mix well.  Stir in the onions, garlic and green chiles; cook stirring for 1-2 minutes until the veggies are slightly softened.

Add all the veggies and stir well to coat with the spices, cook over medium heat and stir until just warm about 2 minutes.

Let the achards cool; stir in the vinegar and spoon into a clean jar. Press down tightly to keep all air out of the veggies.

Cover tightly and let marinate at room temperature for one day.

Stir well and cover; refrigerate until ready to serve.  

Although you can start eating the achards right away, it tastes best after 2 or 3 days of maturing. The longer it matures, the better and mellower it tastes. Keeps well in the fridge for months!

Serve with fresh rolls, toasts, or other breads.

Enjoy!!
Achards with Sourdough toasts

Friday, September 12, 2014

Taro Leaf And Red Lentil Stew With Tamarind (Chembilai Puliyitta Kuzhambu)

This stew is so scrumptious and pretty easy to make - served over any grain or with some bread, it makes a lovely meal. The fragrant spices enrich the stew without making it overly spicy.

I grow taro just for this purpose; leaves and stems are not always available in markets. But it is very easy to grow - see this post on How to Grow Taro.

My grandmother used to prepare this dish using only the stems of the taro and called it "thalakam". You can make it with just leaves or both the stems and leaves. Other greens like amaranth, kale, collards, turnip greens, spinach, Swiss chard, etc may be used if taro leaves are unavailable in any combination. If you are using regular dried tamarind pulp instead of the concentrate, use about a 1" ball; remove seeds and any stringy fibers and soak in a little warm water; then add to the roasted spices and grind together.

Taro Leaf & Red Lentil Stew With Basmati Rice, Taro Stem Thoran
Ingredients:

1 cup Red Lentils (skinless Masoor dal)
1 - 2 mild Green Chiles, chopped
12 - 16 Taro Leaves, finely chopped
1/2 tsp Turmeric
1 tsp Sea Salt
1 Tbsp Tamarind Concentrate

Masala (Spices):
1 tsp Oil
1 Tbsp Coriander Seeds
1/4 tsp Fenugreek Seeds
1 Tbsp Chana Dal
1 tsp uncooked Rice
2 Tbsp Urad Dal
12 whole Black Peppercorns
3 dry Red Chiles
4 Tbsp grated Coconut

Thalippu/Tadka:
1 tsp Oil
1/2 tsp Brown Mustard Seeds
2 dry Red Chiles, broken into two
1 pinch Asafetida
1 stem Curry leaves, sliced into a chiffonade

Method:


Sort the red lentils, wash, drain and cover with fresh water to cover; water should be about an inch above the lentils. Cook over moderate heat until soft.

Masala: While the dal is cooking, prepare the masala - heat the oil in a small pan and roast all the spices and dals until fragrant and lightly browned; add the coconut and cook over medium heat until lightly browned. Remove from heat and let cool. When cool, grind finely using a blender with just enough water as necessary to get a smooth puree.

When the dal is cooked but not mushy, stir in the chopped chiles along with the taro leaves and cook for about 5 minutes.

Add the turmeric, salt, and tamarind and simmer gently for 15 minutes.

Pour the ground Masala into the lentils and greens; add about 1/2 cup of water to gather all of the ground mixture clinging to the blender jar and add to the stew and bring to a boil.

Remove from heat and cover.

Prepare Thalippu: heat the oil in a small pan and add the mustard seeds and chile; when they subside popping, turn off the heat and stir in the asafetida and curry leaves carefully. Quickly cover to avoid splattering hot oil. When sizzling subsides, pour the spices and oil into the stew. 

Stir well and let rest for 10 minutes.

Serve hot over freshly cooked hot rice or other grains. This stew is good with Chapatis or other breads also.

Enjoy!!

Sunday, August 31, 2014

Lemony Gongura Dal (Lentils with Gongura/Sorrel Leaves)

Gongura Dal or Dal with sorrel is a delicious dal (stew) to serve with chapati, naan, or other breads, any grains like rice, quinoa, couscous, etc. The gongura or sorrel leaves add a lovely lemony taste to the dal! I was fortunate to find gongura leaves at the Indian market since I had been wanting make dal, chutney, and thokku with it. Here is the dal - yummy!

Gongura Dal with Quinoa
Notes:  Other dals like red lentils, yellow mung dal, or split peas may be used instead of the chana and toor dals. A little lemon/lime juice may be added to the dal just before or when serving if you like.

Ingredients:

1/4 cup Chana Dal
3/4 cup Toor Dal
1/2 tsp Turmeric
1 tsp Sea Salt
1/2 tsp freshly ground Cumin Seeds
1 small bunch Gongura OR Sorrel leaves (1 cup packed)
1 large Tomato, diced

Thalippu:
2 tsp Oil
1/2 tsp Brown Mustard Seeds
1 pinch Fenugreek seeds
2 dry Red Chiles
1 pinch Asafetida
1 stem fresh Curry Leaves, sliced
2 large Shallots OR 1 small Red Onion, chopped
1-2 hot green chiles, minced

Method:

Pick over the dals and let them soak for about 2 -3 hours in fresh water. Drain and rinse. 

Cook the dals using a pressure cooker or on stove-top with enough water until soft. Dal may be cooked ahead of time.

Heat the oil in a  2-quart sauce pan and add mustard seeds, fenugreek, and red chilies; when the mustard seeds subside popping, add the asafetida and the rest of the thalippu ingredients - curry leaves, green chiles and shallots/onion.

Cover and cook the shallot/onion mixture until softened.

Remove stems from gongura leaves and chop them coarsely. If using sorrel, stems are fine too.

Stir in the gongura leaves and the tomato with the salt, turmeric, and cumin into the thalippu and cook until soft.

Pour the dal into the spice-veggie mixture and stir well; allow dal to come to a boil and turn off the heat.

Let rest for 5-10 minutes.

Taste the dal and adjust salt.

Serve hot with grains or breads accompanied by  veggies or a salad.

Enjoy!!

Wednesday, August 20, 2014

Farro Salad

Mild and delicious Farro is an ancient grain that is similar to wheat or barley. It may be served just like any other grain in addition to being used to prepare salads or soups. Try this easy recipe for a yummy salad.

This salad is wonderful prepared with barley or quinoa also instead of the farro. Other greens such as kale or spinach may be substituted for the arugula.

Farro Salad
Ingredients:

1 cup Farro
1/2 tsp Sea Salt
1 tsp Extra Virgin Olive Oil
1 Tbsp Extra Virgin Olive Oil
1 cup Corn Kernels, fresh or frozen
1/4 tsp Turmeric
1 clove fresh Garlic, minced (optional)
1 large Shallot, thinly sliced
1 small bunch Arugula or other greens, sliced
1 cup Tomatoes, diced
1 small Cucumber, diced
1 Lemon, zest and juice
Freshly ground Black Pepper
2 Tbsp fresh Italian Parsley or Cilantro, chopped

Method:


Cook farro according to package directions with the 1/2 tsp salt.  Drizzle the 1 tsp oil on top and let cool slightly.

While farro is cooling, heat the oil in a skillet and add the corn kernels with a pinch of salt and turmeric; cook stirring often until corn begins to brown a little and caramelizes.

Stir in the garlic if using and the shallots and cook for about 1 minute.

Add the arugula to the skillet and stir until wilted - about 30 - 40 seconds.

Remove from heat and stir in the tomatoes.

Pour the corn mixture into the farro along with the lemon zest and enough lemon juice to taste.

Add the freshly ground pepper to the salad along with the cucumbers and the chopped herbs; mix well. Let rest for about 20 - 30 minutes.

If made ahead of time, chill the salad in a covered container until ready to serve. The salad will stay fresh for a couple of days. Bring to room temperature to serve.

Serve the salad as part of a meal or by itself.

Enjoy!!


Monday, August 18, 2014

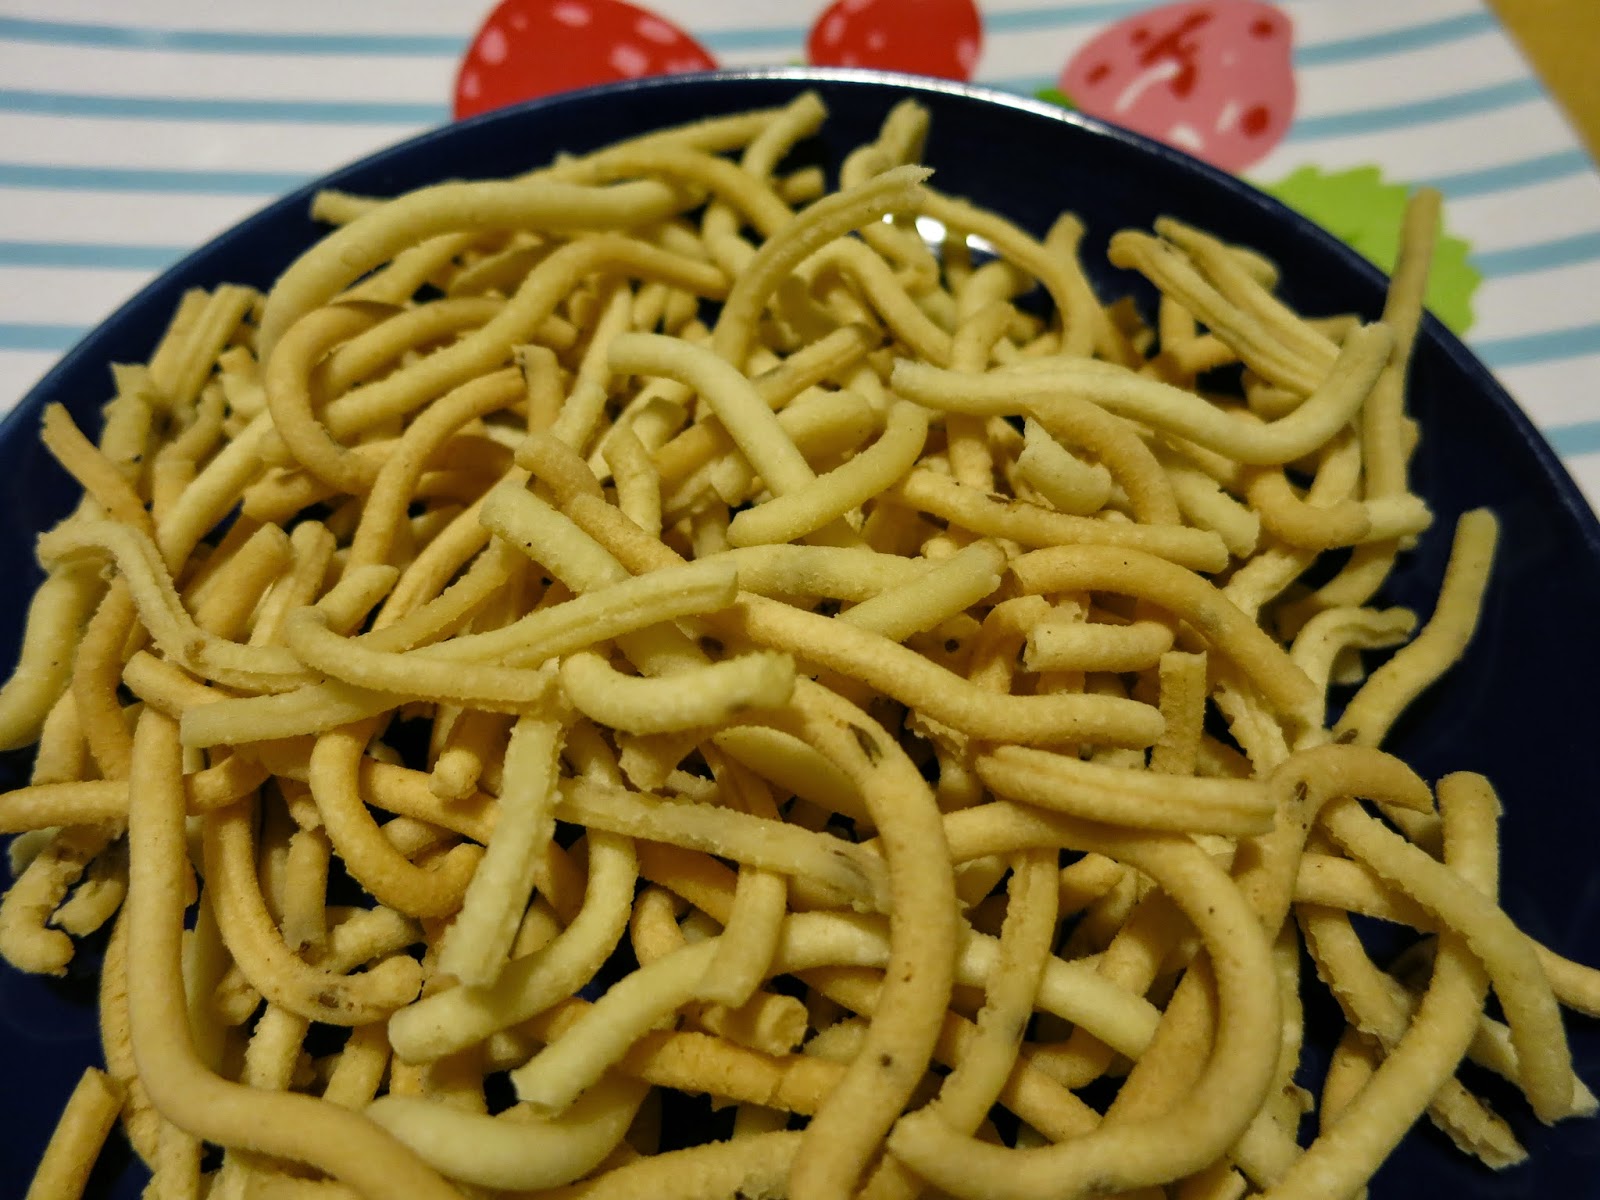
Thenkuzhal (Crisp Rice Spiral Snacks)

Thenkuzhal is a delicious crisp snack made from rice and urad or mung dal similar to another favorite, murukku.  In the old days people did not buy snacks from outside; the ladies of the house prepared them for the family. After the midday meal was served and cleaned up and everyone had a little rest, snacks were prepared. Although these snacks are especially made for special holidays, they are often made as teatime snacks also :D.

Thenkuzhal
The Indians have a special machine made just for the purpose of preparing delicious noodle-like snacks from grains and legumes just like the Italian pasta machine which is used to extrude pasta in different shapes. The machine has many plates with different sizes and shapes to make different types of snacks. The dough is pressed through the machine into the hot oil and fried until crisp. As children, we loved breaking thenkuzhal to pieces to find the letters of the alphabet, shapes, or numbers!

NOTE: As always, please be careful when cooking with hot oil. Water and hot oil do not mix at all and can cause major injury if even a drop falls into the hot oil - with hot oil spattering with explosive violence!! It is best to concentrate on deep frying without any distractions. Please be safe!

8 - 10 Servings

Ingredients:

2 cups Rice flour
1/2 cup Urad flour
1 tsp Sea Salt
1 tsp Cumin seeds
2 Tbsp Sesame seeds
2 Tbsp Earth Balance spread/coconut oil

Oil for deep frying

Method:

Bring a cup of water to a boil and add the salt; let it dissolve and cool completely to room temperature.

Combine the flours with the seeds and knead the Earth Balance or coconut oil into it.

Add the dissolved salt water without any sediment and form a dough adding an additional sprinkle of water if necessary to form a thick but not too stiff a dough.

Follow the directions from the manufacturer to use the Snack Press. Place a handful of dough in the container of the extruder and press to make little spirals into the oil carefully; do not crowd the oil.

Cook the thenkuzhal for a few minutes and flip carefully and gently to cook the other side.

Remove from oil when the noise subsides and thenkuzhal is pale golden; do not overcook.

Drain well on paper towels and allow to cool.

When completely cool, store in an airtight container at room temperature.

Thenkuzhal will last for about 3-4 weeks; at our house though, it lasts may be 3 days max :-) !

Serve as a snack with tea, coffee or other beverages.  Enjoy!!

Thursday, August 14, 2014

Vella Aval (Sweet Flattened Rice Or Poha With Coconut, Cashews and Raisins)

Janmashtami or Bhagavan Krishna's birthday is not complete without Vella Aval; at least some type of sweet aval was always made on the occasion of Janmashtami in our home. The main ingredient, the aval (Tamil), or poha (Hindi), is flattened rice similar to rolled oats. The humble aval is transformed into something truly divine in this simple dish! Vella Aval is also a favorite in many temples in South India - to be given as prasad for all visitors.

The story associated with aval and Krishna is very sweet; it is about true friendship. We never tired of hearing this story as children. Here is the story for those who may not be familiar with it:

Krishna and Sudama were school friends. They were best of friends and parted ways promising to remember each other always.

Sudama wanted to visit his friend but was not sure he should. His wife knew of Sudama's friendship with Krishna and asked her husband to visit him. Sudama was delighted with the idea of seeing his childhood friend again and agreed to go. He told his wife that he needed a gift for his friend. His wife collected rice and prepared aval from it. She tied it in a piece of cloth and gave it to Sudama.

Sudama took the humble gift and walked to Dwaraka, Krishna's city. He arrived in Dwaraka all tired and dusty from his travels. As soon as he saw Sudama approaching his palace, Krishna ran out to meet him and embraced him warmly in spite of Sudama's remonstrances that he was dusty and dirty. He led his friend by hand to his palace and washed his feet with his own hands! Sudama was overwhelmed by the sweet hospitality of Krishna and his queen.

Sudama was shy to offer the gift he had brought thinking it was too small a gift to give a king. But Krishna spied the little package and exclaiming his joy at receiving a gift, reassured Sudama that anything offered with love was dear to him. Krishna said, "a flower, a leaf, a fruit, or even a drop of water offered with a pure heart will be accepted by me with love" and proceeded to gobble it all up.

Krishna and Sudama spent the time reminiscing about their time at school and soon it was time to return home. Sudama left with a reassured heart that he and Krishna had a true friendship irrespective of the difference in their stations in life.

Janmashtami is celebrated grandly with goodies children love since it is the celebration of Baby Krishna's birthday. Crunchy rice flour snacks like spiral murukku and thenkuzhal, marble-sized savory cheedai, etc were customary savories at our house; Vella Aval, vella cheedai, neyyappam, Payasam, fresh fruits, etc the sweets.

Every home and community has its own special menu for the celebration. The whole neighborhood smelled divine with the aroma of cooking wafting in the air. But all of us children knew that we must wait for the special hour of blessing. It was a lesson in patience as well as joy of anticipation before the special treats were blessed and everyone got to enjoy them.
Vella Aval

Here is the lovely Vella Aval recipe:

Ingredients:

1 cup Aval or Poha
1 cup Jaggery or Brown Cane Sugar
1/4 cup Coconut
2 Tbsp Cashews (optional)
2 Tbsp Raisins (optional)
1 Tbsp Ghee OR Earth Balance
1/2 tsp ground Cardamom/ground Dry Ginger

Method:

Pick over the aval to remove stones or other debris; rinse and drain. Add about a half cup of water and let soak while preparing the following.

Place jaggery in a wide pan with 1/2 cup of water and heat over medium heat until jaggery dissolves and forms a thick syrup. Let it boil for a couple of minutes until the raw aroma disappears.

Add the cardamom or ginger and mix well.

Stir in the aval and keep stirring over low-medium heat until aval has absorbed the syrup and become hot and fluffy; there should not be any excess moisture left. Turn off the heat.

Heat the ghee and fry the cashews in it until pinkish; add the coconut and cook until golden.

Stir the raisins in and stir well until raisins begin to puff up.

Remove coconut mixture from heat and stir into the aval. Mix well. Let cool.

Vella Aval is usually served at room temperature.  Enjoy!!

Wednesday, August 13, 2014

Dal Kachori (Lentil-Stuffed Crisp Pastries)


Dal Kachoris are delicious pastries similar to the ever popular samosas and are a great tea time favorite. They are quite simple to make but do take a bit of time; it is helpful to make the filling a day or two ahead. You can use any of the given legumes but can adjust the spices to your preference. The whole spices give a very pleasant taste treat as you munch these pastries that look like UFOs (Utterly delicious Filled Objects). :-)

The store bought Kachoris typically have very little filling - the most flavorful part! I like to really fill them with a good amount; you may wish to use less filling.

Also, my family likes the kachoris soft too - remove them sooner for soft or cook longer for crisp. They kachoris may also be rolled out thinner and cooked on the griddle for dal poori.

24 Kachoris

Ingredients:

Filling:
1 cup yellow Mung, Chana, or Urad dal or Split Peas
1 Tbsp Oil
1 tsp Whole Coriander seeds
1/2 tsp Cumin seeds
1/2 tsp Fennel seeds
2 tsp ground coriander-cumin seeds
1/2 tsp Turmeric
1 tsp Sea Salt
1 tsp Garam/Goda Masala
1/2 tsp Aam choor (dried Mango Powder)

Dough:
1 cup Each, Whole Wheat (atta) and All purpose flour (maida)
1/2 tsp Sea Salt
3 Tbsp Coconut or other oil
1/2 tsp Cumin/Ajwain seeds
1/2 - 3/4 cup cold Water

Method:

Make the filling:

Pick over the dal to remove any foreign matter or discolored dal. Wash and soak in plenty of  fresh water for at least 3 hours. Drain off water and blend or process in a food processor until coarsely ground.

Heat the oil in a kadai/skillet and add the seeds and stir for about 10 seconds; add the ground dal, turmeric, and salt. Cook over medium heat until no longer sticky; the dal should be cooked and dry but should still hold together when made into a ball.

Stir in the ground spices, stir well, cool, and store in a covered container until ready to use. When ready to use, bring to room temperature and firmly form into 24 balls.

For the dough:
Combine the flour, salt and oil in a bowl. Mix well with your fingers until the oil is incorporated into the flour.
Add the seeds and 1/2 cup of the water and knead.  Add a sprinkle of water if needed to make a firm, smooth, and elastic dough.  Cover and let rest for a few minutes or store in an airtight container in the fridge for up to a day.

Divide the dough into 24 equal portions and roll into smooth balls. Keep unused portions covered while you are proceeding with the recipe.

Assembly:
Have the dough at room temperature.

Flatten each piece of dough with you palm and gently pinch the edges to make a larger circle while keeping the center slightly thicker.

Place one ball of filling in the center of the dough and bring together the edges to the top of the filling and pinch to completely enclose.

Gently flatten the kachoris with your hand without breaking or cracking the outer covering. Proceed with the rest of the dough and filling.

After you have prepared a few filled kachoris, start warming the oil for deep frying on medium heat.

When the oil is hot but not smoking, gently drop in 3 or 4 kachoris one at a time into the hot oil and slightly lower the heat.

As soon as the kachoris begin to swell, turn over to start the other side cooking; this insures even cooking and that seams do not open up. If you gently flip the kachoris toward another one while turning, it provides a little support and eliminates splashing hot oil.

Cook the kachoris until they are nice golden brown on both sides. This should take about 7-8 minutes or so. If the oil is too hot, the kachoris will cook too fast and  not become crisp.

Remove kachoris with a slotted spoon from the hot oil and stack them on their edge in a paper towel lined tray.  Proceed with cooking the rest of the kachoris.

Stuffing kachoris - dough to filled kachori on left

Kachoris will last for about 2-3 days without refrigeration; for longer storage, they freeze well. Reheat them by placing them in a 350 F oven until warm and crisp.
Kachori - ready to eat!


Kachoris may be served warm or at room temperature with green and sweet-sour chutneys, and chole, a saucy potato, or pumpkin curry. Enjoy!!

Friday, August 1, 2014

Ripe Plantain Curry (Nendra Pazha Pulisseri)

Nendra pazha pulisseri is another delicious Kerala classic to rival the popular Mango Pulisseri. Both are family favorites and quite easy to prepare. The naturally sweet pulisseri gets its sweetness from the ripe plantain - Nendra pazham in Malayalam! It is divine when paired with the Bitter melon fry... I could wax poetic about the incomparable deliciousness about this combo. A bowl of freshly cooked hot rice with pulisseri and bitter melon fry .... yum!

This delicious pulisseri could do double duty as a pachadi (sweet side dish) in a feast menu during Onam festival or other special occasions instead of mango or other pachadi. 

This pulisseri is vegan and gluten-free too! Although traditionally pulisseri is made with yogurt, I used cashews to give that rich creaminess to this dish and did not miss the yogurt at all. If you like a little tartness, a squirt of lime or lemon just before serving will do the trick.

Pulisseri with its perfect complement of Bitter melon fry!
4 servings 

Ingredients:  

1 ripe Plantain 
1/2 tsp Turmeric
1 tsp Sea Salt
1/2 cup fresh or frozen grated Coconut
1-2 fresh hot Green Chiles (Serrano or Jalapeno)
2 Tbsp raw Cashews
1 tsp uncooked rice

Thalippu/Tadka:
2 tsp Coconut Oil
1/2 tsp Brown Mustard Seeds
3-5 Dry Red Chiles
1 pinch Fenugreek Seeds
1 Stem fresh Curry Leaves, leaves chopped

Method:

Peel the plantain and discard the peels. Dice into small cubes.

Place the plantain in a 2-qt pan with a cup of water, salt, and turmeric. Bring to a boil, and simmer until soft.

Grind the coconut with the cashews, rice, and chiles using a blender into a smooth paste adding just enough water (about 1/3 cup).

Add the ground coconut to the cooked plantain; add 1/2 cup of water to the blender jar and swish to collect all of the coconut - add this also to the plantain.

Bring the pulisseri to a boil adding a little more water if too thick. Remove from heat.

Prepare the thalippu: Heat the oil in a small pan and add the red chiles and mustard seeds. When the seeds start popping, add the fenugreek seeds. cook for a few seconds until the fenugreek changes color slightly. Remove from heat.

Stir in the curry leaves carefully - cover quickly to avoid splattering! When it subsides, add the contents of the Thalippu to the pulisseri. Cover and let rest for 10 minutes.

Serve hot over rice or other grains, with upma, etc.  

Enjoy!!

Thursday, July 31, 2014

Sheekh Kabab With Caramelized Vegetables (Simply Delicious Veg Kabab)

Veggie Sheekh Kababs are amazingly delicious and make quite an entrance when presented to family and friends! With the colorful caramelized veggie topping, they are irresistible!! These Kababs are so delicious, we make a meal of them! Serve them as starters or with a meal. 

I had them in a restaurant and the presentation was fabulous; the kababs were topped with sauteed onions and brought to the table sizzling on a hot cast iron platter! I have recreated them here for everyone's enjoyment; I added the succulent caramelized veggies with an eye for color.

Veggie Sheekh Kababs
Notes: 
1. For nicely browned and crispy kababs, deep fry them. Alternately the kababs may be cooked in a skillet with a drizzle of oil.
2. Unripe green bananas make the best kababs - but potatoes will do if the bananas are not available. The dough may be formed into patties also and cooked in a skillet with a little oil.
3. The dough may be prepared a day or two ahead.
4.  If you don't use all of the dough, chill in fridge for a day or two; or freeze for longer storage.
5. If either chaat or garam masala are unavailable, use a little rock salt, toasted ground cumin, ground black pepper, a little cinnamon and cardamom; you may want to increase the salt a little too as chaat masala has lots of salt.

About 20 small kababs

Ingredients:

2 green unripe Bananas or 3 Potatoes
2 tsp Chaat Masala (Spice Salt)
1/2 tsp Garam Masala
1 tsp Each - ground Coriander & Cumin seeds
1-2 Green Chiles, minced (Jalapeno or Serrano)
1 Medium Carrot, minced
1/2 small Onion, finely minced
4 Tbsp Fresh Cilantro, chopped
Sea Salt to taste as needed (you might not need too much as Chaat masala has lots of salt)
1/4 tsp Turmeric
1 pinch Asafetida
4 Tbsp Besan (Chickpea flour)
Oil for cooking
Green and Sweet chutneys for serving
Caramelized Veggies for serving

Method:

Trim the ends of the green bananas and cut in half; cook in water to cover until soft but not mushy. Let cool.

When cool, remove and discard the peels; coarsely grate or mash the bananas and place in a large mixing bowl.

Add all the rest of the ingredients to the bowl except the oil, chutneys and caramelized veggies.

Knead to mix all the ingredients well; the dough should be firm and not sticky.  Form little ovals or balls and push a chopstick through to make holes in the center - this ensures thorough cooking but is not essential. Wet your hands with fresh water as needed - wet hands help to keep the dough from sticking to your hands.

Deep fry the kababs in hot oil or cook them in a skillet with a little oil.

Serve hot with the chutneys and the caramelized vegetables on the side. Enjoy!!

Caramelized Vegetables: These are great as a topping on pulavs/rice dishes, soups, bruschettas, quesadillas, pizzas, grilled sandwiches, etc.

1-2 Tbsp Oil
1 large Onion, any color, cut into slivers
2 medium Carrots, cut into thin strips
1 Jalapeno or Serrano Chile, cored and thinly sliced (optional)
1 pinch Turmeric
1/2 tsp Sea Salt
2-3 Bell Peppers (Capsicums), yellow, orange, red, or green, thin strips
1/2-1 tsp Smoked Paprika
4 Tbsp fresh Cilantro, chopped

Heat the oil in a wide skillet and add the onions, carrots, and chiles if using with the salt.

Stir and cook over high-medium heat until onions begin to soften - about 2 or 3 minutes.

Add the turmeric and bell peppers and cook stirring often until the veggies begin to brown and caramelize on the edges. Remove from heat.

Stir in paprika and the cilantro.

Serve hot over the kababs. Enjoy!!

Wednesday, July 30, 2014

Pickled Veggies Mexican Style (Escabeche Delicioso)

We adore the pickled veggies often served in Mexican restaurants; the canned ones are too soft and just not the same. So I made our own. These pickles are very easy to make and you can adjust the heat by adding a little or lot of Jalapeno peppers.

The traditional pickles usually contain carrots, onions, garlic, and the Jalapenos; but cauliflower florets, radishes, jicama, chayote squash, zucchini, green beans, etc are welcome additions. If the amount of veggies is increased, the amounts of the seasonings and vinegar need to be increased as well.

These Mexican style pickled veggies are so delicious that we cannot stop eating them; in fact they get eaten right out of the jar before they have a chance to properly marinate! They are great as nibbles or starters, on nachos, as a side with any Mexican food, or great to snack on any time.

Ingredients:

2-4 Jalapenos
2 Carrots
2 Onions
1 Turnip
2 cloves Fresh Garlic
1 tsp Coriander seeds
3-4 sprigs Oregano
3-4 sprigs Thyme
1 Bay Leaf
1 Tbsp Kosher Or Sea Salt
1 cup Apple Cider Vinegar
1 Tbsp Extra Virgin Olive Oil

Large jar suitable for keeping the pickles

Method:

Prepare the jar and lid by washing with very hot water; let them drain upside down on a clean kitchen towel until needed.

Wash all the veggies and herbs and trim them as needed.

Peel and trim carrots, turnips onions and garlic. Quarter turnip and onions. Slice all the veggies, but not paper thin - it is nice to have some substance to bite into :-). About 1/4 inch thick will do nicely. Cut the garlic into thin slices or lightly crush them and leave whole.

Heat a large skillet with the oil and add the onions and garlic; stir for about a minute. Add the rest of the veggies and shake and stir until veggies are warm - about 2 or 3 minutes. Turn off the heat.

Place all the veggies in a sterile jar and add the salt, herb sprigs, spices, and vinegar; stir to coat all the veggies.

Cover tightly and let marinate for a day; stir with a clean spoon or shake a couple of times a day to coat all the veggies with the vinegar. Refrigerate until ready to serve.

Remove what you need of the pickles to a bowl and serve at room temperature. These pickles are good for a month or more if they last that long :). Enjoy!!

Monday, July 28, 2014

Creamy Green Seed Butter (Sunflower-Pepita Spread)

Creamy Sunflower-Pepita Butter is delicious and good for you too! I love serving it with raw veggies, chips, toasted bread; serve it any way you like it. A friend makes it and serves it with slices of carrots, celery, and a few chips for a perfect snack! The herbs may be varied - using whatever is fresh - cilantro, parsley, basil, etc. I have recreated it from the taste and here it is for you to try and enjoy!

I process this spread in a high speed blender to get the ultra-smooth texture; you may process in a food processor also but you will have a slightly chunky version. Both are great but different.

Notes: When made with fresh basil, the spread started to turn brown right away on the surfaces exposed to air. Some fresh herbs tend to oxidize and turn a little brown on the exposed areas when cut or ground; although it might look a bit unappetizing, it does not change the taste and is still quite safe to eat. Blanching the herbs produces a bright green spread that does not brown; just immerse the herbs into boiling or very hot water and immediately lift them out and plunge into ice water to stop the cooking. Drain well and proceed with the recipe.

The seeds may be sprouted - after soaking drain the water, rinse and drain thoroughly. Cover and let sit for 1 or 2 days until they begin to sprout. The seeds should be rinsed and drained thoroughly twice a day to keep them fresh and clean. Use when the seeds have just started to sprout.

Ingredients:

1/2 cup EACH Raw Pumpkin and Sunflower seeds
1 pinch Cayenne pepper or to taste
1 big bunch fresh Coriander (Cilantro) OR 2 cups Basil
1/2 tsp Sea Salt
1 Lemon
2-4 Tbsp Extra Virgin Olive Oil

Method:

Pick over the seeds and discard any discolored seeds or foreign matter; rinse with fresh water, drain and soak in plenty of fresh water for a few hours or overnight.

Remove the very end of the stems from the cilantro. Pick over the coriander leaves and discard yellowed leaves and weeds. Wash in several changes of water to clean thoroughly. 

Drain the soaked/sprouted seeds, rinse with fresh water, and drain well again.

Squeeze  the lemon and discard the rinds.

Place cayenne, cilantro, salt, Olive oil, the soaked seeds and half the lemon juice in the container of a blender; process into a puree adding a couple of tablespoons of water to help process. You may have to stop the blender and push down the ingredients into the blades a couple of times.

Taste and add more lemon juice and salt if you like. I start with 1 lemon and add more as needed.

Scrape into a clean jar, cover, and refrigerate until serving. This will last for a week to 10 days. 

Serve with fresh veggies, toasted breads, rice cakes, crackers, chips, etc. Enjoy!!


Monday, July 21, 2014

Quinoa Pulav (Spiced Quinoa With Veggies)

Colorful and nutritious, Quinoa Pulav is delicious! We love it with fresh and juicy chopped salad or sprouted bean salad. Serve with curries, a raita and chutneys or Indian pickles too if you like. Papadams (Indian lentil wafers) go well with this pulav also. 

This is a basic recipe; the veggies may be varied according to availability, the season, or individual preferences. I change it up a bit by using diced zucchini, colorful peppers, corn, etc in addition to or in place of some of the veggies in the recipe.

Here is a picture of the pulav with sprout salad; it is not a great one but gives one the idea.

Quinoa Pulav with Sprouted Bean Salad

6 servings

Ingredients:

1 cup Quinoa
2 tsp Oil
1/2 tsp Brown Mustard Seeds
1 Tbsp Chana Dal
1 pinch Asafetida
1 small Onion, finely diced
1 Tbsp Ginger, finely minced
1 Green Chile, cored and minced
1 stem Fresh Curry Leaves, leaves sliced finely
1 big pinch Turmeric
1 tsp Sea Salt
1 Carrot, diced
6-8 Green Beans, sliced small
2 Mild Red Peppers OR 1 Red Bell Pepper, diced
2-4 Tbsp Fresh Cilantro, chopped
1 Tbsp fresh sweet mint, sliced (optional)
1/2 Lemon/Lime (optional)

Method:

Start heating 2 cups of water to a boil.

Rinse the quinoa and drain. Set aside until needed; a large strainer is great for draining these fine grains to prevent any down the drain.

Heat the oil and add the mustard seeds and dal. 

When the mustard seeds dance and pop, let them for about 15-20 seconds.

Stir in the onions, ginger, green chile, asafetida and the curry leaves. Stir in the green beans with salt and spices and cook for about 5 minutes on low to medium heat.

Add in the carrots, and peppers and cook for a couple of minutes stirring well.

Pour in the boiling water.

Stir in the quinoa and simmer for about 10 - 12 minutes partially covered - be careful that it does not boil over.

Turn off the heat, cover tightly, and allow the quinoa pulav to sit undisturbed for at least 15 minutes.

Gently stir in the chopped herbs and stir in lemon/lime juice if you like or pass wedges of lemon or lime at the table.

Serve hot, warm or at room temperature with your favorite accompaniments. It is good even cold!

Enjoy!!