Sunday, November 18, 2007

Chole Pindi (Fragrant Chick Peas Stew With Salad)

Chole Pindi with Salad, Broccoli, and Roti
This chole reminds me of the ugly duckling; it looks brown and not as robust as choles with the ripe red tomatoes. But one taste will convince you that it is a glorious swan! Another reminder that one should not judge anything just by its appearance alone!

This dish can be prepared with the white chick peas also known as 'Kabuli Chana' or Garbanzo Beans or the Indian brown ones known as Bengal Gram or Kala Chana. The freshly roasted spices transport the simple chick peas to another dimension altogether, mmm!! Do include the ghee if at all possible because it adds its incredible inimitable flavor. Since it is made without garlic or onions, it is a no-tears recipe fit for special occasions and festivals which call for Satvic dishes too. Now that I have perfected this chole, it has become one of our favorites!

Chole Pindi is gluten free and dairy free if the ghee is omitted. Chole canbe oil free also if the ghee and the oil are omitted. 

Notes: The brown chick peas are wonderfully flavorful, retain their shape and/but do not get soft like the regular chick peas. Small cubes of lightly browned paneer (Indian cheese) or potatoes may be stirred in before serving. Paneer and all the other ingredients are readily available in Indian markets.

Serves 6 as a main dish

Ingredients:

Chick Peas
2 cups Chick Peas, soak in plenty of water and 2 tsp Salt overnight 
1 Bay leaf
1 Brown Cardamom
1 Cinnamon Stick
4 Cloves

Roasted Spice Mix 
1 Tablespoon dried Pomegranate Seeds (anar dana) (Optional)
1 Tablespoon Cumin Seeds
1 teaspoon Whole Black Peppercorns

Chole Pindi
1 tsp Salt
2 Tablespoons ground Coriander Seeds
1 to 2 Tablespoons Dried Mango powder (Aamchoor)
1 teaspoon Garam Masala (any Brand)
2 hot Green chilies, deseeded and minced
1 to 2 Tablespoons Fresh Ginger, grated
1 Tablespoon Ghee (or unsalted butter) (optional)
1 Tablespoon Oil

Salad:
2 large, ripe Tomatoes
1 medium Red Onion
1 medium Cucumber
2 Green Jalapeno Chiliesdeseeded (optional)
1 small bunch Fresh Cilantro
1 or 2 Limes or Lemons

Method:

Drain, rinse and cook the chick peas in a large pot with the spices and water to cover until they are very soft. Alternately cook them in a pressure cooker according to manufacturer's directions. Set aside.

Prepare the roasted spices: lightly roast the pomegranate seeds, cumin, and the black pepper in a dry skillet. Cool and grind to a powder using in a small grinder or mortar and pestle.

Prepare Chole Pindi: Remove the bay leaf, cardamom, cinnamon and cloves from the cooked chick peas and discard. Drain and reserve the cooking fluid from the chickpeas and place them in a large saucepan. Sprinkle the salt, roasted spices, ground coriander seeds, garam masala, and mango powder over the chick peas and stir well to combine. Place the ginger and green chilies on top. In a small pan, heat the ghee and oil until hot and pour over the ginger and green chilies. Pour in the desired quantity of the reserved cooking fluid and simmer stirring occasionally until thickened slightly (about 10 minutes). Let it rest for about 5 minutes.

Prepare the Salad. Peel and thinly slice the red onion and mix with juice from half a lime and a pinch or two of salt. Set aside. Thinly slice the tomatoes, cucumber, and chilies and arrange them on a plate with the marinated onions. Wash the cilantro well and chop coarsely. Sprinkle the cilantro on top of the veggies. Squeeze the other half of the lime over all. Cut the one remaining lime into wedges and arrange on the platter for the individual diners to squeeze over the food as desired.

Serve hot along with the salad. Chole Pindi is great served with rice or any wholegrain roti (Indian flat breads such as Chapati, Nan, Paratha, Pooris, etc) or even on its own. Chole is even better the next day and also freezes well.

Enjoy!!

Tuesday, November 13, 2007

Pav Bhaji With Paneer Cheese (Indian Style Ratatouille or Caponata or Sloppy Joe Over Toast)

Pav Bhaji with pan grilled Ciabatta rolls

Here is a delicious dish that can do double duty as appetizer or snack (or even a meal)! Pav Bhaji means Bread and Veggies. It is based on popular snacks sold by vendors in big cities all over India. Although there are many versions of this dish, this one includes paneer (Indian fresh cheese) along with a lot of veggies. For a vegan dish, omit the paneer; tofu maybe substituted for it.

The last, but not least is the choice of bread; only good crusty bread like Ciabatta, or sourdough French rolls will do for my family. The rolls are split, toasted and buttered or roasted on a griddle only on the buttered cut sides until golden brown. I have also used toasted whole wheat sourdough or whole wheat pita bread in a pinch. One favorite way the children like it is to spread the Bhaji on a Pita bread, sprinkle with grated Parmesan and Cheddar cheeses, and heat in a toaster oven until the cheese melts; seriously YummY!!

I usually make Pav Bhaji for a weekend brunch or snack or as an appetizer for company. The children like it even for a breakfast! I use the food processor to grate all the veggies first. The grated veggies cook quickly and give a nice texture to the dish. I don't use a food processor for chopping the onions, slicing the green beans or chopping the paneer; these I hand chop. I save the pureeing of the tomatoes with garlic (if using) for the last in the processor and pour it directly into the pot.

A few days ago I was getting started to make a festive meal but much to my dismay everyone wanted a snack and not a big meal :(. Since the zucchinis and carrots were already grated, I decided to make Pav Bhaji instead. I did not have any potatoes on hand but had a block of paneer and decided to add it to the Pav Bhaji to make it more substantial. Well, what do you know, everyone absolutely loved it! I had forgotten to stir in the customary butter; but the paneer had added so much buttery flavor, that we did not miss the butter at all! We had the Bhaji with freshly pan toasted Ciabata Rolls; the soft veggies with little nuggets of paneer and the buttery, chewy, crunchy rolls made a fantastic combination :). All anyone wanted with this meal was plenty of hot Masala Chai.

PaneerPav Bhaji Masala and Garam Masala are readily available in Indian Grocery stores. I have used a few brands of Pav Bhaji Masala such as MTRMDH, and Roopak's from India; they were all good.

Ingredients:

2 Tablespoons Oil
1/2 teaspoon Cumin seeds (Jeera)
1 Tbsp Fresh Ginger, finely grated
1 medium Red Onion, finely chopped
1 Red Bell Pepper, finely chopped
1/2 teaspoon Red pepper (cayenne)
1 teaspoon ground Turmeric (Haldi)
Salt to taste
2 Tablespoons Pav Bhaji Masala (Your favorite brand)
1 block (14 0z.) Paneer, cut into small cubes (about the size of peas)
4 large, ripe Tomatoes, quartered and pureed
1 clove Garlic (Optional)
1 large Japanese Eggplant, finely chopped or grated
1/2 a small Cauliflower, coarsely chopped or grated
1 large Carrot, grated
1 large Zucchini, grated
1 small bunch Green Beans, finely sliced crosswise
1 cup corn kernels (fresh or frozen)
1 cup tiny Green Peas (fresh or frozen) (sometimes called petite peas)
1/2 teaspoon Garam Masala
1 or 2 Tablespoons Butter (Optional)
1/2 cup fresh Cilantro, chopped

Garnish:

Red Onion, chopped
Cilantro, chopped
Lemon or Lime wedges

Method:

Heat the oil in a large Stainless Steel Dutch Oven or an Indian Wok. Add cumin seeds and when they start popping and browning a little, add ginger, onions and bell pepper. Stir and add pinch or two of salt, a pinch of turmeric, and half the spices and cook until the onions soften. Stir in the paneer cubes and cook until lightly browned. Remove the paneer and veggies with a slotted spoon and set aside. Add the tomato puree to the pot with one tsp salt, turmeric, and the rest of the spices and allow it to come to a boil. Stir in the eggplant and simmer for 10 minutes. Mix in the cauliflower, carrots and zucchini and cook on medium heat stirring occasionally for 15 to 20 minutes. Keep the pot covered between stirrings to keep the heat in and steam the veggies. Add the green beans along with the corn kernels and cook for 10 minutes. Mix in the green peas and cook until heated thoroughly, about 5 to 10 minutes. Taste for seasonings and adjust the salt and Pav Bhaji masala to your taste. Sprinkle the Garam Masala and add the butter and the cilantro and mix well. Let sit covered for 5 minutes or so while you are toasting the rolls. If you are using an Indian cast iron wok, the veggies should be transferred immediately after cooking to a non reactive container like a ceramic or glass dish.

To serve Pav Bhaji traditionally, split rolls and butter the cut sides. Roast them only on the cut sides on a griddle or skillet and press down on them to brown evenly. Cook until golden and hot. Arrange the rolls on a plate with a scoop of the hot Bhaji on the side with a pat of butter on top and sprinkled with chopped red onions and cilantro and Lime/Lemon wedges to squeeze according to the individual diner's taste.

Variations: Mild vegetables like Opo squash, chayote squash, green bell peppers etc. or frozen mixed veggies can be used instead of or along with the above mentioned veggies. One or two cooked potatoes can also be added towards the end of cooking. Aromatic fresh methi leaves or spinach can also be used in small quantities (about one cup). Or one can sprinkle one Tablespoon of dried methi leaves called Kasoori Methi (available in Indian Markets) at the end of cooking for a great result.

Note: A large wok (Indian or not) is the perfect vessel for preparing Pav Bhaji. It heats quickly and conducts the heat throughout the veggies so the dish is prepared very fast. The only caveat is that even a seasoned wok can have scratches and the exposed iron surface will react especially with the acidic and moist contents and hence has to be transferred to a non-reactive container at the end of cooking.

Monday, October 15, 2007

Aviyal (Vegetables With Tamarind Coconut Sauce)

A few vegetables suitable for Aviyal

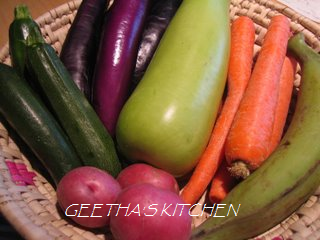
Mmmm... Aviyal! Just the mere sight of the cornucopia of vegetables set aside for the day's meal proclaimed without a doubt what was forthcoming and ensured that there would be no complaints or tears at meal time. The veggie basket was full to the brim with a large slice of winter melon (Chinese name), green unripe bananas or plantains, a type of true yam called 'chenai', carrots, green 'Opo' squash, big golden hued cucumbers, slender green or purple eggplants, long green stick-like moringa pods called 'drumsticks', Gavar or regular green beans and a green mango or two. Aviyal literally means 'this and that' and includes at least 5 to 7 mild veggies or more.

My mother would make a huge pot of aviyal to serve over hot steamed rice accompanied by lots of fried plain papadams; one of the perfectly jubilant meals of our childhood days! Amma loved making aviyal as much as we loved eating it since she could get us to eat lots of veggies, which prepared any other way guaranteed to bring on a spate of complaints and at times even a profuse waterfall of tears! With aviyal she did not have to worry about the children getting their 5 servings of veggies a day:).

Cut vegetables for Aviyal

Ingredients:

Tamarind Water:
1 Golf ball size Dried Tamarind Pulp
2 cups Water
1 teaspoon ground Turmeric
2 teaspoons Salt (or to taste)

Vegetables:
1/2 small Lauki (Opo Squash)
2 Zucchinis
2 Japanese or Chinese Eggplants
2 Carrots
1 green Plantain Banana
2 Drum Sticks (Indian Vegetables) Optional
2 Cups Green Beans or Gavar Beans
1 or 2 Potatoes
1 small green or yellow Bell Pepper
1 green unripened Mango, Optional

Masala (Spices)1 Tablespoon Cumin Seeds
1 cup Fresh or Frozen Grated Coconut
1 EACH, Fresh Green Chili and Dry Red Chili, seeds removed
1 teaspoon uncooked Rice

Seasoning:
2 Sprigs Fresh Curry Leaves
2 Tablespoons Coconut Oil

Method:

Make Tamarind water by soaking the tamarind in 1/2 cup of hot water. When softened and cool enough to handle, work with fingers kneading well, and remove and discard any seeds. Pour the tamarind pulp in the blender container with the remaining water and blend smooth. If this process is too much work, then one can buy the Tamarind Paste or Concentrate in a jar and dissolve a Tablespoon of paste or 2 tsp of the concentrate in 2 cups of water. Add turmeric and Salt.

Wash all the veggies, peel Opo squash, Plantains, mangoes and Carrots. The plantains don't need to be peeled like one would an eating banana; use the peeler to just peel the thin outer green skin. Plantains can stain your hands as well as the cutting board; you can use gloves to protect the hands and the cutting board can be cleaned with a mild bleach solution and rinsed well. Cut all the vegetables into julienne pieces about the size of your little finger.

Heat the Tamarind water in a large Dutch Oven. Add the Opo squash, eggplant and Plantains and bring to a boil; now add the rest of the vegetables and bring to a boil again. Reduce the heat and simmer covered, stirring very gently (so as not to crush the veggies) only as needed to keep the veggies from sticking to the bottom of the pot for about 15 minutes or until the vegetables are just tender.

Make the Masala while the veggies are cooking: grind together in the blender the cumin seeds, chilies, rice and the coconut to a smooth paste adding enough water to make blending feasible. When the veggies are tender but not mushy, stir in the Masala. Rinse the blender with a few Tablespoons of water to get all of the masala and pour this into the Aviyal. At this point check to see the consistency of the aviyal. We like the aviyal to have lots of gravy to eat with rice or roti. Add a little more water as desired. Bring to a good rolling boil and turn off the heat. Check for seasoning and add more salt if necessary.

Crush the fresh Curry leaves in your hand to release the flavors and place on top of the aviyal. Pour the Coconut Oil on top and cover the pot immediately. Let sit for 10 minutes for the flavors to meld. This step is very important for the Aviyal. Stir well and serve hot. Aviyal is even better the next day if there is any left ;)!

Aviyal with Roti and a Tangerine


Note: The bananas or plantains and the mangoes must be absolutely green and unripened; even the slightest ripening would change the flavor. For a spicier dish, leave the seeds in the chilies and/or use more chilies. For truly authentic taste, the fresh curry leaves are absolutely a must. Don't waste your money on the dried store bought curry leaves which have no flavor at all.

Here is a way to make your own flavorful dry curry leaves. Wash the fresh curry leaves; spin dry in a salad spinner or just gently towel dry and lay out on a clean, dry towel in a single layer on the counter until completely dry and store them in an airtight container.

Wednesday, October 3, 2007

Cauliflower with Carrots and Peas

Cauliflower with carrots and peas, Cherry tomato salad, Fresh yogurt, Simple Dal, Roti with ghee
Another everyday vegetable that cooks quickly and is a wonderful accompaniment with a myriad of other dishes! Serve with rice or roti (a whole grain flat bread also known as chapati), some dal/bean dish and/or some plain yogurt to provide a nutritious meal. It makes a wonderful veggie wrap rolled up in a Chapati or Whole Wheat Tortilla with a little Cheddar, Jack, Parmesan, or Goatmilk cheese.

Dals are split and skinned dry beans. In addition to being used as main ingredients in many dishes they are also used toasted in the Tadka/Talippu to add a nutty taste and slight crunch in South Indian Cuisine. Urad dal and Chana dal are the traditional dals used in Tadka. Urad dal is creamy white and looks a little like short grain rice; the Chana dal looks like yellow split peas. If these are unavailable, go ahead and make the dish without them since split peas do not make very satisfactory substitutes.

4-6 Servings

Ingredients:

1 Small Cauliflower
2 Carrots
1 cup Peas, fresh or frozen
1 tsp Salt or to taste
1/2 tsp ground Turmeric

Tadka/Thalippu:

1 or 2 Tsp Oil
1/2 tsp Brown Mustard Seeds
1 Tbsp Urad dal
1 dry Red Chili
1 pinch Asafoetida
1 sprig Fresh Curry Leaves

Method:

Wash the cauliflower and carrots and cut into bite sized pieces.

Heat the oil in a skillet or wok with the mustard seeds, urad dal and red chile. Cover and cook until the mustard seeds finish dancing. Stir in asafoetida and add the curry leaves and cover quickly to avoid hot oil from splashing. Add the cauliflower and carrots and cook covered stirring occasionally until the veggies are just tender (15 to 20 minutes at most). Stir in the peas and cook stirring until warmed through. Serve hot or at room temperature with rice, roti and a dal dish such as simple dal. Enjoy!!

Variations: Cumin seeds (1/2 tsp whole or crushed) make a fine addition to the Tadka. A hot green chili can be used instead of the dry red chili. If using a green chili add it along with the onions or veggies. A finely chopped onion may be stirred into the tadka and cooked until onions are soft before adding the veggies. Potato cubes are a great addition and should be added first and cooked for 10 minutes before adding the rest of the veggies. When adding onions and potatoes the salt and chilies may be increased to suit your taste.

Simple Dal (Yellow Split Peas Stew) With Mustard Seeds

Simple Toor Dal

This is a very simple and delicious dish made with skinless Toor dal that can be served alone as a soup or with any kind of rice or breads. Toor dal looks a little like yellow split peas and either the yellow or green split peas can be substituted for the toor dal. The use of a pressure cooker to cook the dal speeds up the process considerably. All one needs to complete the meal is a side vegetable or salad, rice or any kind of bread and a bowl of yogurt.

Ingredients:

1 cup Toor Dal
1/2 tsp ground Turmeric
1 tsp Salt or to taste

Tadka/Thalippu

1 Tbsp Ghee or Oil
1/2 tsp brown Mustard seeds
1/2 tsp Cumin Seeds
1 or 2 pinches Asafoetida
1 green Chili, such as Serrano or Jalapeno
1 sprig Curry Leaves
4 Tbsp Fresh Cilantro Leaves (Dhania/Kothumalli)

Method:

Check for stones then wash the dal. Cook in water to cover with the salt and turmeric until very soft and creamy. Thin the dal with boiling water if a thinner dish is preferred. Set aside.

Prepare tadka: Heat the ghee or oil in a small pan, add the seeds and cover. When the seeds slow down popping, quickly add asafoetida, stir then add the chili and curry leaves. Cover quickly to avoid hot oil splashing as the fresh chili and curry leaves hit the hot oil. Cook for a few seconds and then remove from heat.

Stir the tadka into the dal and mix well.

Stir in the chopped cilantro leaves and serve hot with any type of flat breads like chapati, naan, etc or over hot rice.

Serve with lime or lemon wedges to squeeze over individual servings according to taste. Enjoy!

Variations:

A small chopped onion may be stirred in with a pinch of salt at the same time as the green chili, etc. You may need to increase the amount of ghee or oil to 2 Tbsp to keep the onions from sticking. One large coarsely chopped tomato may be added to the soft onions and cooked until they are soft before adding to the dal.

Tuesday, October 2, 2007

Jaya Thathi's Apple Carrot Chutney


This fabulous Apple Carrot Chutney is not just pretty on the plate, it is pretty delicious on the palate too! When my mother started making this recipe on a crisp yet sunny fall day many years ago, I was very skeptical about the apple-carrot combination; but Amma just smiled and told me to wait and see. The rest is history!

Autumn with its bounty of fresh apples is the perfect time to make this chutney. The bubbling pot of the apple carrot chutney fills the home with a wonderful aroma and warmth on cool crisp days. A jar of Apple Carrot Chutney makes a wonderful gift for any occasion.

Ingredients:

5 lbs McIntosh Apples
2 lbs Carrots
2.5 lbs Sugar
1 tsp Salt
1 tsp Ground Dry Red Chili
3 Tbsp grated Fresh Ginger
2 Lemons
1/2 tsp freshly ground Cardamom (about 12 pods)
1/4 tsp freshly grated Nutmeg

Method:

Wash the apples, peel, core and dice. Wash, peel and finely dice or shred the carrots. Place apples and salt in a large stock pot with the sugar. Heat, stirring constantly until the sugar draws out the fluid from the apples. Now add the carrots. Stir every few minutes and cook until apples and carrots are soft and the syrup has thickened. Turn off the heat and stir in the ginger, lemon juice and spices. Cool and serve with any meal or bread, toast, cottage cheese or plain yogurt and even ice cream!

For a wonderful appetizer for company, serve the chutney spooned over a mound of cream cheese and sprinkled with coarsely chopped roasted and salted nuts like almonds, pistachios or cashews with whole grain breads, crackers and roasted papadams.

This chutney will last for a few weeks in the refrigerator. Fill sterilized canning jars and process according to manufacturers directions for longer storage.

Note: If McIntosh apples are unavailable, other apples such as Rome beauty, Golden Delicious, Granny Smith, etc. could be substituted alone or in any combination you like. I have made this chutney with Granny Smith alone or with a medley of apples; all were delicious.

This recipe makes enough for about a dozen pint size jars; enough to give a few away to family and friends.

Apple carrot chutney on cinnamon raisin bagel
with cream cheese

Thursday, September 27, 2007

Cilantro Pesto With Cashews

This beautiful emerald green cilantro pesto is fabulous stirred into hot/cold pasta or soups, spread on sandwiches and wraps, as a dip for warm bread, or diluted with more olive oil and some lemon juice to make a delicious salad dressing. It makes a great appetizer too: Swirl a spoonful or two into Hummus or place a spoonful in a small saucer of extra virgin olive oil to serve with any kind of good crusty bread. This beautiful pesto, which is very similar to the Indian chutneys, has a little kick to it because of the red or Jalapeño chili!

This pesto can be made without the cheese or nuts for vegans/people with allergies.


Cilantro, Parmesan cheese, Olive Oil, Salt, Garlic,
Toasted Pumpkin seeds and Dry Red Chili

Ingredients:

2 large bunches of Cilantro
5 cloves fresh Garlic
1/3 cup extra virgin Olive Oil (plus a little more for covering the top)
1/2 tsp Salt
1/3 cup grated Parmesan Cheese, (Optional)
1/4 cup Cashews or other nuts or seeds (Optional)
1 dry red chili or 1 green Jalapeño chili
1 tsp dry roasted Whole Cumin Seeds, ground

Method:

Roast the nuts/seeds you are using in a dry skillet without any oil to a pale gold. Remove from heat. Break the red chili if using, into two pieces and shake out and discard the seeds and stir into the warm nuts/seeds. Place the whole thing on a heat-resistant plate or bowl and set aside to cool.

Sort the cilantro to remove weeds and yellow or spoiled leaves. Wash thoroughly in several changes of fresh water. Drain well and trim off the stems about an inch below the leaves.

Peel garlic and trim the stem end. Cut Jalapeño if using, into two (remove the seeds and membranes for a milder pesto).

Place cilantro, cumin, garlic, nuts and the salt and process in a food processor container fitted with the metal blade or a blender until finely minced. You may have to scrape the sides to push all the ingredients into the blades a few times. Pour the olive oil in a thin stream through the chute while the machine is running and process to a smooth puree. Add Parmesan cheese and pulse until mixed thoroughly. Remove to a clean, dry glass jar; add a thin layer of olive oil to cover the top and keep refrigerated until needed.

Variations: Almonds, pistachios, or pumpkin seeds (pepitas) could be substituted for the cashews. One can also make the pesto with one bunch each of cilantro and Italian parsley (flat leaf type).

Makes about 8 to 10 ounces


Hummus with Cilantro Pesto


Here is a lovely version of hummus with a little cilantro pesto and roasted cumin seeds for an Indian touch! Serve with the traditional pita triangles, toasted bread, or crisp vegetables including Romaine Lettuce hearts.

Hummus

Cooked Chick Peas, Lemon, Tahini, Garlic, Cumin, Cayenne & Salt

Ingredients:

1 cup dry Chick peas (garbanzo beans)
4 or 5 cloves of fresh Garlic
1 large Lemon, or to taste
1 tsp Cumin seeds
1/8 tsp ground Dry Red Chili (Cayenne) or to taste
1 tsp Salt
1/4 cup Tahini (Sesame Butter)
Chopped fresh Cilantro, for garnish
Extra virgin olive oil, Paprika or Cayenne for sprinkling on top (optional)

Method:

Sort the chick peas to remove discolored peas or other organic matter such as little rocks. Rinse the chick peas well and soak in plenty of water to cover overnight or at least 5 or 6 hours. If you are in a hurry, pour boiling water over the chick peas and let them soak for 2 hours. Drain the soaked chick peas by either method and cook in water to cover (about four cups) with a pinch of salt until they are very soft; this might take at least an hour or a little more. A pressure cooker greatly shortens the time of cooking as well as conserving fuel. Let cool.

Peel garlic and trim off the stem ends. Toast the cumin seeds in a dry skillet until fragrant. Transfer immediately to a saucer to cool. Cumin seeds may be used without toasting as well. Finely grind the cumin seeds using a mortar and pestle or a spice grinder. Grinding the cumin can be omitted if you are using a blender for making the hummus; the seeds don't get pulverized enough in a food processor. Squeeze the Lemon and discard the seeds and rinds.

You may have to make the hummus in small batches depending on the blender/food processor. Place the garlic, cumin, salt and tahini into the food processor container fitted with the metal blade or a blender container. Transfer the cool chick peas with a slotted spoon to the blender/processor container; set aside the cooking liquid to use as needed during processing. Add the lemon juice and process to a smooth puree scraping down the sides occasionally. Add the cooking liquid from the chick peas or cold water as needed to moisten the hummus to desired consistency and process until smooth.

Combine the batches of hummus and adjust salt and lemon to your taste. Do not be concerned if the hummus is a bit runny; it thickens upon standing. Chill until ready to serve.

Place the hummus in a serving dish (if it is too thick, thin to desired consistency with a little of the cooking liquid or cold water). Swirl a spoonful or two of the cilantro pesto into the hummus for a marbled effect. If desired, drizzle with a little extra virgin olive oil and sprinkle a little paprika or cayenne and chopped cilantro.

Serve at room temperature with fresh warm pita bread, naan or chapati triangles, tortilla chips or your favorite raw vegetables including Romaine lettuce hearts.

Serves 6 to 8

Variations: Roasted vegetables such as carrots or red bell pepper are good processed along with the chick peas. Adjust the amount of chick peas used depending on the amount of roasted veggies. Also adjust the seasoning to your taste. The traditional pesto with basil could be substituted for the cilantro pesto.

Tuesday, September 25, 2007

Fragrant Barley-Mung Dal Soup With Winter Squash and Carrots

Mung dal cooks up so luxuriously velvety, one has to experience it! Mung Dal used here is skinless and split, is a lovely yellow color, and cooks very quickly in about 20 minutes compared to regular split peas (they are good too) which can take as much as an hour or more to reach creaminess. I make this soup often for family and friends who just can't get enough of it! It is full of the goodness of squash and carrots and redolent with the fragrant spices.

The only problem was that our family did not care for the veggies that become mushy when cooked. Pureed veggies were alright at first but kind of boring and pasty without the texture.

So one day I had the grand inspiration to grate the veggies for the soup! It was absolutely amazing; the veggies cooked very fast and and enriched the soup beyond imagination:)! Although the grated veggies practically vanished, they still retained their texture and worked their flavor magic too. The soup was wonderfully creamy and fragrant with the veggies distributed throughout!! And it looked absolutely GORGEOUS! Did I say we love this soup :)?

6 - 8 Servings

Ingredients:


2 cups split, skinless Mung dal
1/4 cup Barley
1/2 small Kabocha or Butternut squash (Optional)
2 large zucchinis
2 large carrots
1 Tbsp Oil
1 tsp Cumin seeds
1 large red onion, finely chopped
1 Tablespoon fresh Ginger, finely grated
1 green Jalapeno chili, deseeded and minced
1 sprig fresh Curry Leaves, minced
2 tsp Sambar Powder
1 tsp ground Turmeric
2 tsp Salt
Freshly ground Pepper, to taste
1/2 cup chopped cilantro leaves
1 Tablespoon Oil OR Ghee (Indian clarified butter) or unsalted butter
1 tsp Whole Cumin Seeds
1 pinch Asafetida

Method:


Check the dal and remove discolored beans, stones and other debris. Wash the dal and barley in plenty of water two or three times and cook in water to cover until very soft and creamy. Dal and barley can be pressure cooked as well.

Wash and grate carrots and zucchini (lightly peel the carrots if you wish). Dice the Kabocha or Butternut Squash into tiny cubes if using. Mince the Jalapeno chili. Finely chop the onion.

Heat the oil with the cumin seeds. When they dance and brown slightly, add the chopped onion, curry leaves, chili, ginger and a pinch of salt. Cook stirring until the onions are soft. Stir in all the spices, salt and then the grated and chopped veggies. Cook and stir for about 2 or 3 minutes. Add enough water to just cover the veggies, about 2 or 3 cups. Let the soup come to a boil, turn heat down, and add the cooked dal. Stir well to mix thoroughly and simmer for 5 minutes. Add boiling water to the desired consistency. Check and add salt and freshly ground pepper to taste if necessary.

Heat the Ghee/oil (or the butter) in a small pan until very hot. Add Cumin seeds and when they brown a little, add the asafetida. Stir in this spicy Ghee and the chopped cilantro into the soup; let sit for 5 minutes or for the flavors to meld. Serve hot.

The leftover soup can be cooled and frozen for up to a three months. Enjoy!!

Carrot Salad With Lime Juice and Mustard Seeds


Carrot Salad is a wonderful crunchy and colorful accompaniment to any meal or snack. It is very simple and quick - if you use a food processor to grate the carrots, it takes next to no time at all:). This recipe is dedicated to all my friends who just adore it! For best results use absolutely fresh carrots and ripe limes which are more yellow than bright green! Don't be alarmed by the term "Tadka/Thalippu" ! It is nothing but a little oil heated with the seasonings to heighten the flavor of the dish.

Ingredients:

4 large fresh carrots
1/2 tsp Salt
1 Lime

Tadka/Thalippu:

2 tsp Canola oil
1/2 tsp brown Mustard seeds
1 pinch Asafoetida
2 small Green Chilis, ends slit
1 Sprig Curry leaves

Method:

Scrape carrots lightly and cut off the ends. Grate them coarsely. Place the grated carrots in a bowl, sprinkle the salt and squeeze the lime over them. Heat the oil for tadka/thalippu. Add mustard seeds, cover and cook until they pop. Add green chilis, asafoetida and the curry leaves and cook about 30 seconds. Pour the tadka over the carrots and mix well. Serve immediately or cover and chill until needed. The carrot salad will keep in the refrigerator for a few days.

Variation:

A juicy Meyer lemon or a regular lemon may be substituted for the lime. For a spicier version, deseed (or not!) the green chilies and chop them and proceed as above.

Friday, September 21, 2007

Lemon or Lime Rasam

Lemon/Lime Rasam is a delicate soup with a bright citrus flavor. A rasam of one kind or another was always a must in our grandparents' home. Rasams are part of the everyday meals as well as banquets in South India. They make a fabulous beginning or end to a meal or a light meal with rice.

Rice mixed with Lemon/Lime Rasam, carrot salad, cabbage thoran,
roasted papadams, and homemade yogurt.

Ingredients:

1/8 cup Toor Dal
1 pinch salt
1 pinch ground Turmeric

2 medium Tomatoes, coarsely chopped
1/4 tsp ground Turmeric
1/2 tsp Salt
1 Tbsp Rasam Powder
1 large Lime or Meyer Lemon (or a regular lemon)

Tadka/Thalippu

2 tsp Ghee or oil
1/2 tsp Mustard seeds
1/2 tsp Cumin (Jeera) seeds
1 dry whole Red Chili
1 pinch Asafoetida (Hing)
1 sprig fresh Curry leaves
2 Tbsp chopped fresh Coriander/Cilantro (Dhania/Kothumalli)

Method:

Cook Toor dal with the pinch of turmeric and salt in 2 cups of water until very soft and creamy; set aside.

Place the chopped tomatoes in a 2 qt saucepan with turmeric, salt, rasam powder and 1 cup of water. Bring to a boil and simmer until tomatoes are very soft. Mash the dal thoroughly and add enough water to make 3 cups altogether. Add to the tomatoes in the pan. Simmer on medium to low heat until foamy; do not allow it to boil. Turn off heat.

In a small pan prepare the tadka/talippu: heat the ghee or oil and add mustard seeds, cumin seeds and red chili. Cover and cook until the seeds pop and finish their dance; turn off the heat. Quickly add asafoetida and the curry leaves and cover again to avoid the hot oil splashing as fresh curry leaves pop and sputter in the hot oil. Add the whole thing carefully to the rasam. Add the chopped cilantro and let rest for about 5 minutes.

Cut the lime or lemon in half and squeeze the juice. Discard any seeds and the rinds. Stir in the juice, mix well and serve hot in mugs/bowls by itself or mixed with softly cooked rice. Enjoy!

NOTES:

Pappadums (fried or roasted) and simple vegetable curries make wonderful companions for rasam.

If fresh tomatoes are unavailable one can still make this rasam with canned or dried tomatoes or even none at all. If tomatoes are not used, then increase the amount of lime/lemon juice to taste.

Sunday, August 26, 2007

Annapoorna's Amma Rasam (Instant Tomato Rasam or Soup)


Rasam is one of the ultimate comfort foods and an ubiquitous dish in the South Indian Cuisine. I adore rasam and rice every day; or even a steaming mug of rasam with the meal, as a snack, etc.

There are many kinds of rasams to suit many occasions, but Amma Rasam is a quick and simple one; it doen't even require rasam podi. It was handed down from my husband's paternal grandmother, Annapoorna, and hence the name! She made this rasam when someone did not feel well or an extra dish was needed in a hurry upon the arrival of an unexpected guest. Her rasam was such a hit that it got baptized as Amma Rasam to distinguish it from the other kinds!

Rasams benefit greatly from the use of Ghee in the tadka/thalippu. Use Ghee if at all possible. Do include Fresh curry leaves as they add their unmistakable and indispensable aroma to rasam. Also if there is one dish to be generous with a big pinch of the potent asafoetida, it is rasam!

Note: If you have rasam powder handy, a teaspoon may be added along with the tomatoes for a lovely flavor.

Ingredients:

1-2 tsp tamarind concentrate or juice extracted from a small walnut size ball of dry tamarind
1 T Ghee or oil
1/2 tsp each mustard seeds and Cumin seeds
1 T Chana dal
1 T Toor dal
3 dry red Chilies
1 or 2 pinches asafoetida
1 sprig Curry leaves
1 or 2 large tomatoes, coarsely chopped
1/2 tsp freshly ground black pepper
1 thin slice fresh Ginger (optional)
1/2 tsp turmeric
1 tsp salt or to taste
1 tsp Indian Jaggery or brown sugar (optional)
2 T fresh cilantro, chopped

Method:

If using dried tamarind pulp, pinch off a piece about the size of a walnut from a block of dry tamarind and soak in about 2 cups of hot water for a few minutes. When cool enough to handle, work the pulp with your fingers to knead it well and squeeze out and discard the solids and strain the liquid. Set aside the tamarind liquid until needed. If using tamarind concentrate, dissolve it in 2 cups of hot water.

Heat 1 T oil in a 2 or 3 quart sauce pan. Add mustard and cumin seeds, the dals, and the chilies. When the mustard seeds finish popping, add the Curry leaves and then the tomatoes. Add salt, pepper, turmeric, ginger if using and 3 cups of water. Stir in tamarind water and the jaggery. Let it come to a boil, reduce heat and cook until the tomatoes are soft, about 15 minutes. Turn off the heat, add the chopped cilantro, cover and let rest for 5 minutes for the flavors to meld. The solids at the bottom (the dals and spices) are generally not eaten from this rasam.

This Rasam is traditionally served over softly cooked rice with a little ghee or a pat of butter, vegetable side dishes and roasted papadums. A mug of rasam is fabulous to sip just by itself or along with the meal. Enjoy!!

Wednesday, August 15, 2007

Upma (Cream of Wheat Pilaf with Vegetables)

Upma with Yogurt

Here is a simple and hearty South Indian dish one can cook up in a jiffy with cream of wheat - very satisfying and nutritious too! Upma is such a versatile dish that can be served from breakfast to tea time; in fact any time at all! In the old days people from near or far often dropped by to visit without prior notice and Upma was one of the dishes that would be served to accompany the customary welcome tea. It is an everyday dish that can be dressed up with cashew nuts for special occasions.

Sooji or Rava is a fine Indian cream of wheat. Any type of finely cracked grain can be used including regular cream of wheat. Sooji, Chana Dal, Urud dal, asafoetida, curry leaves and mustards seeds, etc are readily available at Indian markets.

Serves 4

Ingredients:

1-2 Tbsp vegetable oil
1 Tbsp Ghee (clarified butter) (optional)
½ tsp Brown Mustard seeds
1 Tbsp Chana dal
1 Tbsp Urad dal
1 pinch Asafetida (Hing powder)
1 Tbsp fresh Ginger, finely minced or grated
1 or 2 green Chili, seeds and membranes removed and finely minced
1 small red Onion, finely chopped
1 sprig of fresh Curry leaves
1 tsp Salt or to taste
1/2 cup each shredded carrots, fresh or frozen peas and corn kernels
2 cups Water
1 cup Sooji (Rava or Cream of Wheat)
2 Tbsp chopped Cilantro leaves
2 Tbsp toasted Cashew pieces (Optional)
½ Lime or Lemon, juiced

Method:

1. Roast the grains in a dry skillet stirring constantly until they are lightly browned and fragrant. Pour on a plate and let cool until ready to use. Roasting may be done several days in advance; if you do, cool completely and store in an airtight jar. Roasting the grains results in a fluffy dish whereas the raw grains result in a soft creamy dish. Try roasted or raw, decide for yourself!

2. Heat the oil and ghee in a 2-3 quart pot or an Indian wok (Kadai).

3. Add mustard seeds, Chana dal and Urad dal when the oil is hot and cover with a lid to keep the mustard seeds from escaping while they pop.

4. When the mustard seeds finish popping, lower the heat to prevent burning and add the asafoetida quickly.

5. Stir in the ginger, green chili, the onions, curry leaves and the salt immediately and cook over medium heat until onions are translucent and softened.

6. Stir in the vegetables and the water and bring to a boil. Turn heat down so the water is just simmering and cook until veggies are almost tender.

7. Add the cream of wheat in a fine stream while stirring constantly. When all the grains are incorporated and well mixed, cover and cook on low heat for about 5 minutes stirring occasionally to keep from sticking or burning.

8. Turn off heat and let sit for 5 minutes.

9. Stir in lime/lemon juice if desired. Stir in or sprinkle on top the cilantro leaves and serve hot garnished with the cashews. Upma is delicious on its own or paired with any Indian pickle or chutney, ripe mango pulisseri, curries, any type of raita, tomato chutney, gothsu, and fresh unflavored yogurt.

Variations: Finely cracked wheat, cream of rice (rice rawa) or coarse cornmeal can be used instead of sooji. Upma can also be made without any onions or veggies; in this case a 1/4 cup of fresh grated coconut is stirred in at the end and cilantro and lemon/lime juice are not added.

Tuesday, August 14, 2007

Masala Chai (Spicy Tea)

Masala Chai
Here's a recipe for Masala Chai. You can easily make your own chai for a fraction of the cost of coffee/tea house chai and it is more flavorful too. Serve it steaming hot or cold over ice cubes depending on the weather or your inclination!

According to my sister the green tea adds fragrance while the black adds body! The spices are considered digestive particularly after a rich meal. My mother used to add a little crushed black pepper during cold season to alleviate coughs. It is also refreshing and restoring after a hard day's work. A cup of Masala Chai with a couple of shortbread cookies, buttered toast or samosas makes for a lovely snack. Enjoy!

4 servings

Ingredients:

2 cups Milk, any kind
2 cups water
2 tbsp fresh ginger, chopped and crushed well or finely grated
sugar or honey to taste
7 cardamom pods, crushed well
2 tsp each, black and green tea leaves
1 tsp whole black pepper, lightly crushed (optional)

Method:

Bring the water to a boil with the spices. Add milk and the teas and bring to a boil again. Turn off heat, strain, and sweeten with sugar or honey. Serve piping hot by itself or with snacks. Enjoy!!

Variations: More cardamom or ginger may be used if a spicier version of tea is preferred. One teaspoon of fennel or anise seeds, a few cloves, and a cinnamon stick may be used along with the other spices if desired. Whole or low fat milk can be used as preferred. One can also add a little cream for a richer tea. 

Sunday, August 12, 2007

Pal Payasam (Rice Pudding with Milk)

This is the simplest of payasams with only 3 ingredients! This is the way it is made at the Bhagavan Krishna Temple in Mukundapuram, Kerala, India. The only change I have made is to use low fat instead of whole milk.

6 Servings

Ingredients:
1/2 cup uncooked rice (Basmati, Patna, Sona Masuri or Rosematta)
4 cups 1% milk
1/2 cup sugar

Method:

Rinse the rice and soak it in two cups of the milk for one hour. Stir in the sugar, the rest of the milk and bring it to a boil. Reduce heat and simmer on low heat stirring occasionally until the rice is very soft and creamy - about 1 hour. Serve hot, warm or cool as you wish. This makes a thick payasam; if a thinner payasam is preferred, add 1 to 2 cups of extra milk at the time of adding milk and sugar.

Variations: Alternately, cook the soaked rice in a pressure cooker. Then proceed as in the recipe above.

Ground cardamom and saffron may be added just before the end of cooking. Cashews pieces and raisins sautéed in ghee (clarified butter) and/or chopped almonds and pistachios may be added as a garnish.