Sunday, August 31, 2014

Lemony Gongura Dal (Lentils with Gongura/Sorrel Leaves)

Gongura Dal or Dal with sorrel is a delicious dal (stew) to serve with chapati, naan, or other breads, any grains like rice, quinoa, couscous, etc. The gongura or sorrel leaves add a lovely lemony taste to the dal! I was fortunate to find gongura leaves at the Indian market since I had been wanting make dal, chutney, and thokku with it. Here is the dal - yummy!

Gongura Dal with Quinoa
Notes:  Other dals like red lentils, yellow mung dal, or split peas may be used instead of the chana and toor dals. A little lemon/lime juice may be added to the dal just before or when serving if you like.

Ingredients:

1/4 cup Chana Dal
3/4 cup Toor Dal
1/2 tsp Turmeric
1 tsp Sea Salt
1/2 tsp freshly ground Cumin Seeds
1 small bunch Gongura OR Sorrel leaves (1 cup packed)
1 large Tomato, diced

Thalippu:
2 tsp Oil
1/2 tsp Brown Mustard Seeds
1 pinch Fenugreek seeds
2 dry Red Chiles
1 pinch Asafetida
1 stem fresh Curry Leaves, sliced
2 large Shallots OR 1 small Red Onion, chopped
1-2 hot green chiles, minced

Method:

Pick over the dals and let them soak for about 2 -3 hours in fresh water. Drain and rinse. 

Cook the dals using a pressure cooker or on stove-top with enough water until soft. Dal may be cooked ahead of time.

Heat the oil in a  2-quart sauce pan and add mustard seeds, fenugreek, and red chilies; when the mustard seeds subside popping, add the asafetida and the rest of the thalippu ingredients - curry leaves, green chiles and shallots/onion.

Cover and cook the shallot/onion mixture until softened.

Remove stems from gongura leaves and chop them coarsely. If using sorrel, stems are fine too.

Stir in the gongura leaves and the tomato with the salt, turmeric, and cumin into the thalippu and cook until soft.

Pour the dal into the spice-veggie mixture and stir well; allow dal to come to a boil and turn off the heat.

Let rest for 5-10 minutes.

Taste the dal and adjust salt.

Serve hot with grains or breads accompanied by  veggies or a salad.

Enjoy!!

Wednesday, August 20, 2014

Farro Salad

Mild and delicious Farro is an ancient grain that is similar to wheat or barley. It may be served just like any other grain in addition to being used to prepare salads or soups. Try this easy recipe for a yummy salad.

This salad is wonderful prepared with barley or quinoa also instead of the farro. Other greens such as kale or spinach may be substituted for the arugula.

Farro Salad
Ingredients:

1 cup Farro
1/2 tsp Sea Salt
1 tsp Extra Virgin Olive Oil
1 Tbsp Extra Virgin Olive Oil
1 cup Corn Kernels, fresh or frozen
1/4 tsp Turmeric
1 clove fresh Garlic, minced (optional)
1 large Shallot, thinly sliced
1 small bunch Arugula or other greens, sliced
1 cup Tomatoes, diced
1 small Cucumber, diced
1 Lemon, zest and juice
Freshly ground Black Pepper
2 Tbsp fresh Italian Parsley or Cilantro, chopped

Method:


Cook farro according to package directions with the 1/2 tsp salt.  Drizzle the 1 tsp oil on top and let cool slightly.

While farro is cooling, heat the oil in a skillet and add the corn kernels with a pinch of salt and turmeric; cook stirring often until corn begins to brown a little and caramelizes.

Stir in the garlic if using and the shallots and cook for about 1 minute.

Add the arugula to the skillet and stir until wilted - about 30 - 40 seconds.

Remove from heat and stir in the tomatoes.

Pour the corn mixture into the farro along with the lemon zest and enough lemon juice to taste.

Add the freshly ground pepper to the salad along with the cucumbers and the chopped herbs; mix well. Let rest for about 20 - 30 minutes.

If made ahead of time, chill the salad in a covered container until ready to serve. The salad will stay fresh for a couple of days. Bring to room temperature to serve.

Serve the salad as part of a meal or by itself.

Enjoy!!


Monday, August 18, 2014

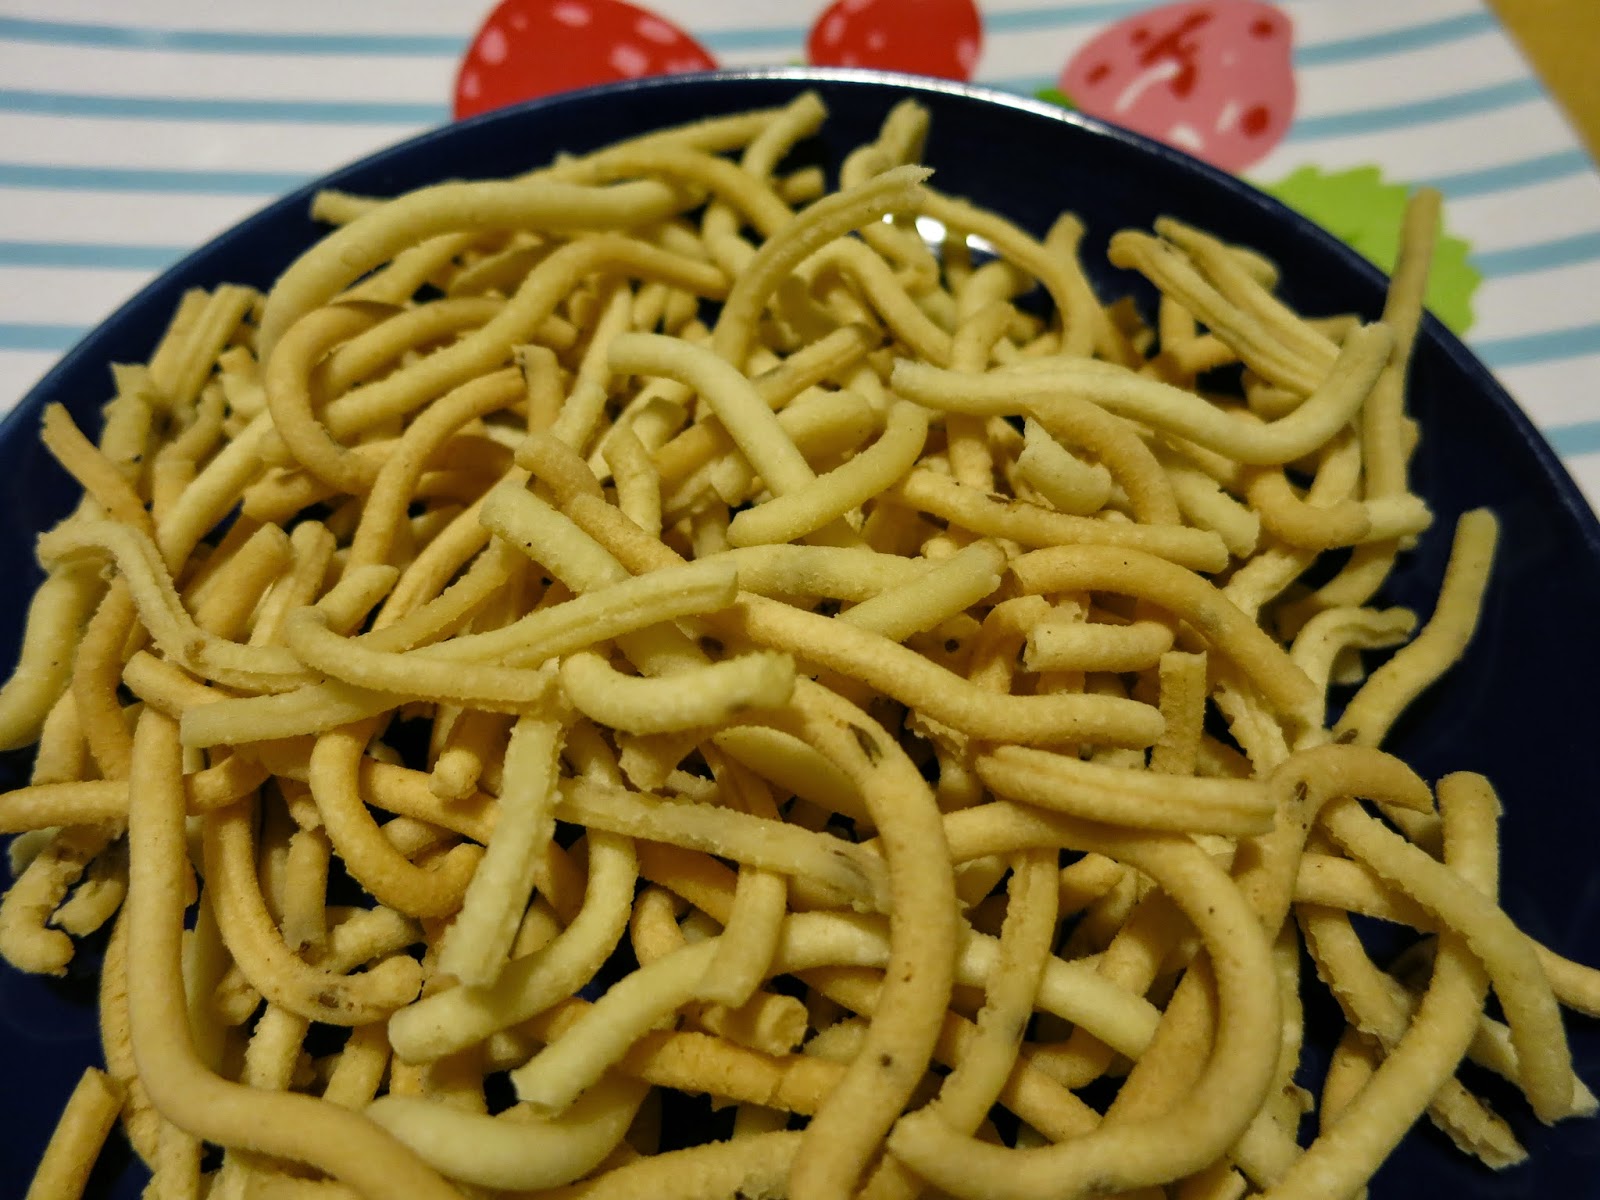
Thenkuzhal (Crisp Rice Spiral Snacks)

Thenkuzhal is a delicious crisp snack made from rice and urad or mung dal similar to another favorite, murukku.  In the old days people did not buy snacks from outside; the ladies of the house prepared them for the family. After the midday meal was served and cleaned up and everyone had a little rest, snacks were prepared. Although these snacks are especially made for special holidays, they are often made as teatime snacks also :D.

Thenkuzhal
The Indians have a special machine made just for the purpose of preparing delicious noodle-like snacks from grains and legumes just like the Italian pasta machine which is used to extrude pasta in different shapes. The machine has many plates with different sizes and shapes to make different types of snacks. The dough is pressed through the machine into the hot oil and fried until crisp. As children, we loved breaking thenkuzhal to pieces to find the letters of the alphabet, shapes, or numbers!

NOTE: As always, please be careful when cooking with hot oil. Water and hot oil do not mix at all and can cause major injury if even a drop falls into the hot oil - with hot oil spattering with explosive violence!! It is best to concentrate on deep frying without any distractions. Please be safe!

8 - 10 Servings

Ingredients:

2 cups Rice flour
1/2 cup Urad flour
1 tsp Sea Salt
1 tsp Cumin seeds
2 Tbsp Sesame seeds
2 Tbsp Earth Balance spread/coconut oil

Oil for deep frying

Method:

Bring a cup of water to a boil and add the salt; let it dissolve and cool completely to room temperature.

Combine the flours with the seeds and knead the Earth Balance or coconut oil into it.

Add the dissolved salt water without any sediment and form a dough adding an additional sprinkle of water if necessary to form a thick but not too stiff a dough.

Follow the directions from the manufacturer to use the Snack Press. Place a handful of dough in the container of the extruder and press to make little spirals into the oil carefully; do not crowd the oil.

Cook the thenkuzhal for a few minutes and flip carefully and gently to cook the other side.

Remove from oil when the noise subsides and thenkuzhal is pale golden; do not overcook.

Drain well on paper towels and allow to cool.

When completely cool, store in an airtight container at room temperature.

Thenkuzhal will last for about 3-4 weeks; at our house though, it lasts may be 3 days max :-) !

Serve as a snack with tea, coffee or other beverages.  Enjoy!!

Thursday, August 14, 2014

Vella Aval (Sweet Flattened Rice Or Poha With Coconut, Cashews and Raisins)

Janmashtami or Bhagavan Krishna's birthday is not complete without Vella Aval; at least some type of sweet aval was always made on the occasion of Janmashtami in our home. The main ingredient, the aval (Tamil), or poha (Hindi), is flattened rice similar to rolled oats. The humble aval is transformed into something truly divine in this simple dish! Vella Aval is also a favorite in many temples in South India - to be given as prasad for all visitors.

The story associated with aval and Krishna is very sweet; it is about true friendship. We never tired of hearing this story as children. Here is the story for those who may not be familiar with it:

Krishna and Sudama were school friends. They were best of friends and parted ways promising to remember each other always.

Sudama wanted to visit his friend but was not sure he should. His wife knew of Sudama's friendship with Krishna and asked her husband to visit him. Sudama was delighted with the idea of seeing his childhood friend again and agreed to go. He told his wife that he needed a gift for his friend. His wife collected rice and prepared aval from it. She tied it in a piece of cloth and gave it to Sudama.

Sudama took the humble gift and walked to Dwaraka, Krishna's city. He arrived in Dwaraka all tired and dusty from his travels. As soon as he saw Sudama approaching his palace, Krishna ran out to meet him and embraced him warmly in spite of Sudama's remonstrances that he was dusty and dirty. He led his friend by hand to his palace and washed his feet with his own hands! Sudama was overwhelmed by the sweet hospitality of Krishna and his queen.

Sudama was shy to offer the gift he had brought thinking it was too small a gift to give a king. But Krishna spied the little package and exclaiming his joy at receiving a gift, reassured Sudama that anything offered with love was dear to him. Krishna said, "a flower, a leaf, a fruit, or even a drop of water offered with a pure heart will be accepted by me with love" and proceeded to gobble it all up.

Krishna and Sudama spent the time reminiscing about their time at school and soon it was time to return home. Sudama left with a reassured heart that he and Krishna had a true friendship irrespective of the difference in their stations in life.

Janmashtami is celebrated grandly with goodies children love since it is the celebration of Baby Krishna's birthday. Crunchy rice flour snacks like spiral murukku and thenkuzhal, marble-sized savory cheedai, etc were customary savories at our house; Vella Aval, vella cheedai, neyyappam, Payasam, fresh fruits, etc the sweets.

Every home and community has its own special menu for the celebration. The whole neighborhood smelled divine with the aroma of cooking wafting in the air. But all of us children knew that we must wait for the special hour of blessing. It was a lesson in patience as well as joy of anticipation before the special treats were blessed and everyone got to enjoy them.
Vella Aval

Here is the lovely Vella Aval recipe:

Ingredients:

1 cup Aval or Poha
1 cup Jaggery or Brown Cane Sugar
1/4 cup Coconut
2 Tbsp Cashews (optional)
2 Tbsp Raisins (optional)
1 Tbsp Ghee OR Earth Balance
1/2 tsp ground Cardamom/ground Dry Ginger

Method:

Pick over the aval to remove stones or other debris; rinse and drain. Add about a half cup of water and let soak while preparing the following.

Place jaggery in a wide pan with 1/2 cup of water and heat over medium heat until jaggery dissolves and forms a thick syrup. Let it boil for a couple of minutes until the raw aroma disappears.

Add the cardamom or ginger and mix well.

Stir in the aval and keep stirring over low-medium heat until aval has absorbed the syrup and become hot and fluffy; there should not be any excess moisture left. Turn off the heat.

Heat the ghee and fry the cashews in it until pinkish; add the coconut and cook until golden.

Stir the raisins in and stir well until raisins begin to puff up.

Remove coconut mixture from heat and stir into the aval. Mix well. Let cool.

Vella Aval is usually served at room temperature.  Enjoy!!

Wednesday, August 13, 2014

Dal Kachori (Lentil-Stuffed Crisp Pastries)


Dal Kachoris are delicious pastries similar to the ever popular samosas and are a great tea time favorite. They are quite simple to make but do take a bit of time; it is helpful to make the filling a day or two ahead. You can use any of the given legumes but can adjust the spices to your preference. The whole spices give a very pleasant taste treat as you munch these pastries that look like UFOs (Utterly delicious Filled Objects). :-)

The store bought Kachoris typically have very little filling - the most flavorful part! I like to really fill them with a good amount; you may wish to use less filling.

Also, my family likes the kachoris soft too - remove them sooner for soft or cook longer for crisp. They kachoris may also be rolled out thinner and cooked on the griddle for dal poori.

24 Kachoris

Ingredients:

Filling:
1 cup yellow Mung, Chana, or Urad dal or Split Peas
1 Tbsp Oil
1 tsp Whole Coriander seeds
1/2 tsp Cumin seeds
1/2 tsp Fennel seeds
2 tsp ground coriander-cumin seeds
1/2 tsp Turmeric
1 tsp Sea Salt
1 tsp Garam/Goda Masala
1/2 tsp Aam choor (dried Mango Powder)

Dough:
1 cup Each, Whole Wheat (atta) and All purpose flour (maida)
1/2 tsp Sea Salt
3 Tbsp Coconut or other oil
1/2 tsp Cumin/Ajwain seeds
1/2 - 3/4 cup cold Water

Method:

Make the filling:

Pick over the dal to remove any foreign matter or discolored dal. Wash and soak in plenty of  fresh water for at least 3 hours. Drain off water and blend or process in a food processor until coarsely ground.

Heat the oil in a kadai/skillet and add the seeds and stir for about 10 seconds; add the ground dal, turmeric, and salt. Cook over medium heat until no longer sticky; the dal should be cooked and dry but should still hold together when made into a ball.

Stir in the ground spices, stir well, cool, and store in a covered container until ready to use. When ready to use, bring to room temperature and firmly form into 24 balls.

For the dough:
Combine the flour, salt and oil in a bowl. Mix well with your fingers until the oil is incorporated into the flour.
Add the seeds and 1/2 cup of the water and knead.  Add a sprinkle of water if needed to make a firm, smooth, and elastic dough.  Cover and let rest for a few minutes or store in an airtight container in the fridge for up to a day.

Divide the dough into 24 equal portions and roll into smooth balls. Keep unused portions covered while you are proceeding with the recipe.

Assembly:
Have the dough at room temperature.

Flatten each piece of dough with you palm and gently pinch the edges to make a larger circle while keeping the center slightly thicker.

Place one ball of filling in the center of the dough and bring together the edges to the top of the filling and pinch to completely enclose.

Gently flatten the kachoris with your hand without breaking or cracking the outer covering. Proceed with the rest of the dough and filling.

After you have prepared a few filled kachoris, start warming the oil for deep frying on medium heat.

When the oil is hot but not smoking, gently drop in 3 or 4 kachoris one at a time into the hot oil and slightly lower the heat.

As soon as the kachoris begin to swell, turn over to start the other side cooking; this insures even cooking and that seams do not open up. If you gently flip the kachoris toward another one while turning, it provides a little support and eliminates splashing hot oil.

Cook the kachoris until they are nice golden brown on both sides. This should take about 7-8 minutes or so. If the oil is too hot, the kachoris will cook too fast and  not become crisp.

Remove kachoris with a slotted spoon from the hot oil and stack them on their edge in a paper towel lined tray.  Proceed with cooking the rest of the kachoris.

Stuffing kachoris - dough to filled kachori on left

Kachoris will last for about 2-3 days without refrigeration; for longer storage, they freeze well. Reheat them by placing them in a 350 F oven until warm and crisp.
Kachori - ready to eat!


Kachoris may be served warm or at room temperature with green and sweet-sour chutneys, and chole, a saucy potato, or pumpkin curry. Enjoy!!

Friday, August 1, 2014

Ripe Plantain Curry (Nendra Pazha Pulisseri)

Nendra pazha pulisseri is another delicious Kerala classic to rival the popular Mango Pulisseri. Both are family favorites and quite easy to prepare. The naturally sweet pulisseri gets its sweetness from the ripe plantain - Nendra pazham in Malayalam! It is divine when paired with the Bitter melon fry... I could wax poetic about the incomparable deliciousness about this combo. A bowl of freshly cooked hot rice with pulisseri and bitter melon fry .... yum!

This delicious pulisseri could do double duty as a pachadi (sweet side dish) in a feast menu during Onam festival or other special occasions instead of mango or other pachadi. 

This pulisseri is vegan and gluten-free too! Although traditionally pulisseri is made with yogurt, I used cashews to give that rich creaminess to this dish and did not miss the yogurt at all. If you like a little tartness, a squirt of lime or lemon just before serving will do the trick.

Pulisseri with its perfect complement of Bitter melon fry!
4 servings 

Ingredients:  

1 ripe Plantain 
1/2 tsp Turmeric
1 tsp Sea Salt
1/2 cup fresh or frozen grated Coconut
1-2 fresh hot Green Chiles (Serrano or Jalapeno)
2 Tbsp raw Cashews
1 tsp uncooked rice

Thalippu/Tadka:
2 tsp Coconut Oil
1/2 tsp Brown Mustard Seeds
3-5 Dry Red Chiles
1 pinch Fenugreek Seeds
1 Stem fresh Curry Leaves, leaves chopped

Method:

Peel the plantain and discard the peels. Dice into small cubes.

Place the plantain in a 2-qt pan with a cup of water, salt, and turmeric. Bring to a boil, and simmer until soft.

Grind the coconut with the cashews, rice, and chiles using a blender into a smooth paste adding just enough water (about 1/3 cup).

Add the ground coconut to the cooked plantain; add 1/2 cup of water to the blender jar and swish to collect all of the coconut - add this also to the plantain.

Bring the pulisseri to a boil adding a little more water if too thick. Remove from heat.

Prepare the thalippu: Heat the oil in a small pan and add the red chiles and mustard seeds. When the seeds start popping, add the fenugreek seeds. cook for a few seconds until the fenugreek changes color slightly. Remove from heat.

Stir in the curry leaves carefully - cover quickly to avoid splattering! When it subsides, add the contents of the Thalippu to the pulisseri. Cover and let rest for 10 minutes.

Serve hot over rice or other grains, with upma, etc.  

Enjoy!!